Overview
CommGen is a process that runs based on a set of run control parameters provided by the user. This process can be run either online, by pressing the run button on the page, or can be set up to run during the evening batch schedule. When set up to produce letter communications, an output file is created and accessible for printing. When sending emails, the messages are produced and sent directly from the system. The process selects all students with a communication row for the specified letter code where the communication is not yet marked complete.
Note: Before running CommGen, you must have previously set up the data source, developed your template, created a report definition, and included the CommGen parameters on the letter code setup. It is also highly recommended that you test any new communications (newly created or converted from LetterGen) in the test database (CSQA). Steps are included below to describe the necessary procedures.
Navigation
Campus Community > Communications > Communication Generation
Step-by-Step Process
- Click the Add a New Value tab.
- Enter a name for the Run Control.
- The suggested naming convention is: <FunctionalArea>-COMMGEN-<LetterCode>.
- Functional Areas for Student Administration include:
- RA = Recruiting and Admissions
- FA = Financial Aid
- SR = Student Records
- SF = Student Financials
- HE = Cross Student Administration
- Optionally, a functional description can be added to the Run Control name following the Letter Code. For example, RA-COMMGEN-E54-AppAck.
- Click Add.
- The Run Control is added under your User ID only. Others wishing to use the same Run Control parameters must set up their own identical Run Control ID.
Selection Parameters tab
- From the ID Selection drop-down list, select All Person IDs.
View the ID Selection and Letter Code fields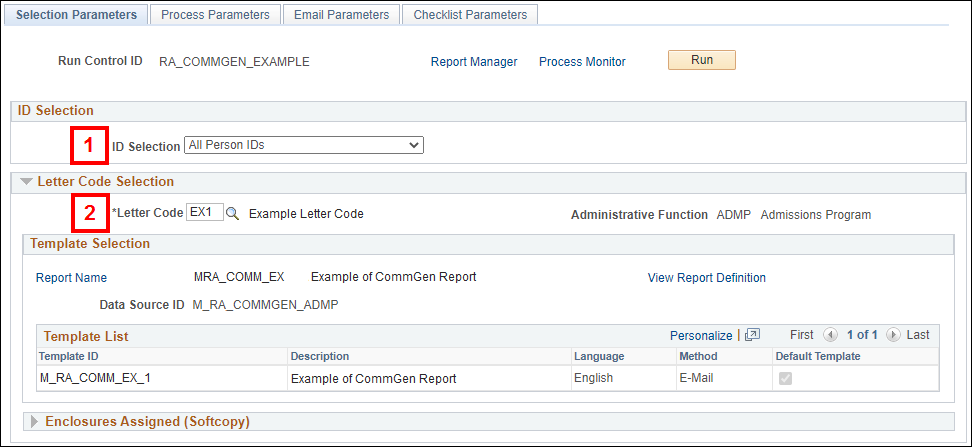
- Note: This is NOT the default value. Not updating to All Person IDs results in warning/error messages.
- Enter or lookup the Letter Code.
- In the Communication Method Usage section, select the communication delivery Method from the drop-down list.
View the Communication Method Usage section
- To generate a letter, set the Method to Letter. For email generation, set the Method to Email.
- The Method set under the Communication Method Usage section must match the Method value populated in the Template List section, which can be found above on the same page.
- In cases where more than one Template ID and Method are associated with a Letter Code, either option (Email or Letter) can be selected in the Communication Method Usage section.
- If the Letter Code includes enclosures, click Refresh Enclosure List.
- This step must be done every time you run CommGen if the Letter Code includes enclosures.
Process Parameters tab
- From the Address drop-down list, select your preferred Address usage option. Depending on the option selected, the process sequentially evaluates the list of Address types until it finds a match for each student with a communication.
View the Process Parameters tab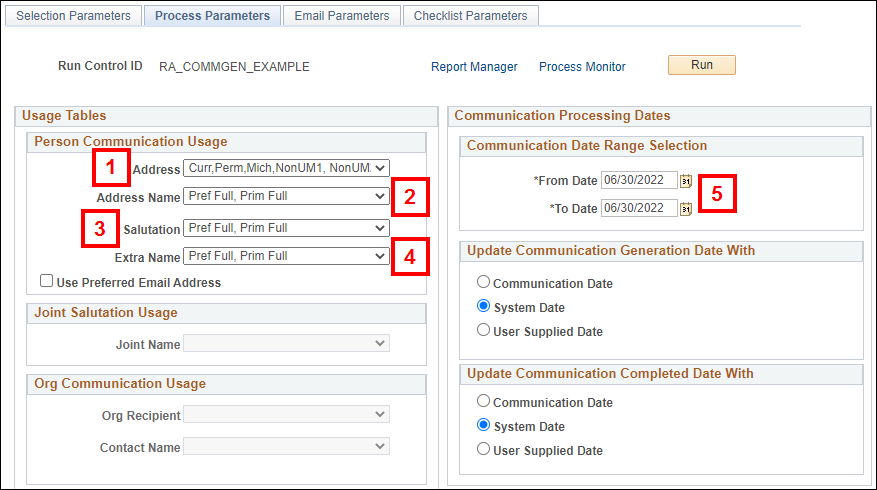
- The Email Address Usage types for CommGen are:
- Curr, Perm, Mich, NonUM1, NonUM2
- Non MICH email types (Curr, Perm, NonUM1, NonUM2)
- UM Preferred Email Order (Mich, Curr, Perm, NonUM1, NonUM2)
- All other Address Usage types are intended for Printed Letter mailing.
- The Email Address Usage types for CommGen are:
- From the Address Name drop-down list, select your preferred Address Name order.
- From the Salutation drop-down list, select your preferred Salutation order.
- From the Extra Name drop-down list, select your preferred Extra Name order.
- Enter the date range in the Communication Date Range Selection section. The range should include the date the communication code was applied to a person.
- Select your Output Settings:
- Online Preview: This setting allows you to route a small batch (10 or less) of test emails to an inbox of your choice.
View an Online Preview output setup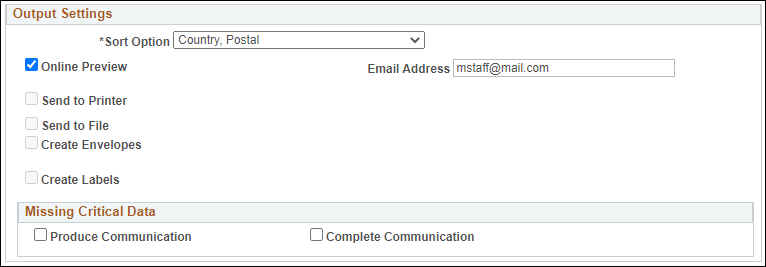
- After checking the Online Preview box, enter an email address in the Email Address field that displays.
- Running the process in Online Preview mode does not mark the communication record as complete, allowing you to repeat this process as needed for testing.
- Online Preview functionality works the same whether you are producing emails in the M-Pathways Student Administration test environment (CSQA) or in the Production environment.
- Email: To send email messages to all selected students, the Online Preview option should not be selected.
View an Email output setup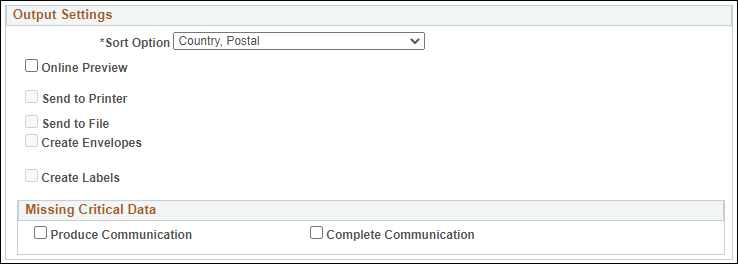
- In the Production environment, all emails are delivered to the intended recipients.
- In the test environment (CSQA), all emails are delivered to a designated test inbox (its-satestmail@umich.edu). No emails are ever delivered to the actual student addresses when running CommGen in the test environment.
- Letters: To produce letters, check the Send to File box and leave the File Path blank.
View a Letter output setup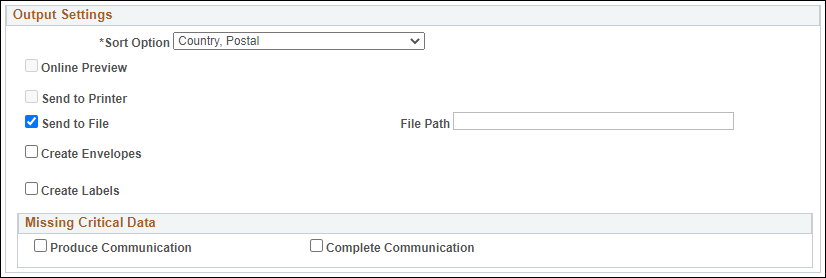
- The letters are automatically directed to Report Manager.
- This same setting is used whether you are producing letters in the test environment (CSQA) or in the Production environment.
- Online Preview: This setting allows you to route a small batch (10 or less) of test emails to an inbox of your choice.
- Missing Critical Data refers to information needed in order to send or produce a communication successfully. This generally includes a missing email address or mailing address for a student.
- Produce Communication – check this box to produce the communication even if there is missing critical data. This setting applies only to printed letters as an email will not go through if an invalid or blank address exists.
- Complete Communication – check this box to complete the Communication record even if there is missing critical data.
- ITS recommends both the Produce Communication and Complete Communication boxes NOT be checked.
Email Parameters tab
Note: Only complete this section if sending emails.
- Enter the email address of the person/office that should display in the email's From field. If you want a specific name to display in the From field, enter that name in parenthesis after the email address. For example, OUA@umich.edu (Office of Undergraduate Admissions)
View the Email Parameters tab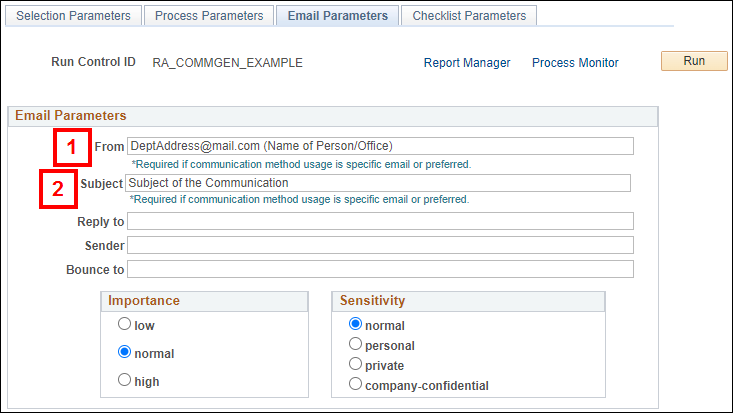
- The email address entered here is not required to be a valid email address.
- Enter the Subject.
- Complete any other fields as needed.
- It is recommended that a general office email address be added in the Reply to and Bounce to fields. This ensures the office is notified when there is a reply to the communication or if the communication bounces due to an undeliverable email address.
Checklist Parameters tab
Note: Only complete this section if the communication being produced is associated with checklist codes and item(s).
- Enter or look up an Administrative Function. Selecting an Administrative Function gives you additional options to select.
View the Checklist Item Selection section
- Check the Respect Variable Data box to enforce a system selection of only those checklists and items whose variable data matches that of the communication record itself.
- It is recommended that this box is checked in most cases to ensure the appropriate data is made available within the communication.
- Select Checklist Code in the Checklist Context section.
- Choose the Checklist Type from the drop-down menu.
View the Checklist Type and Checklist Code sections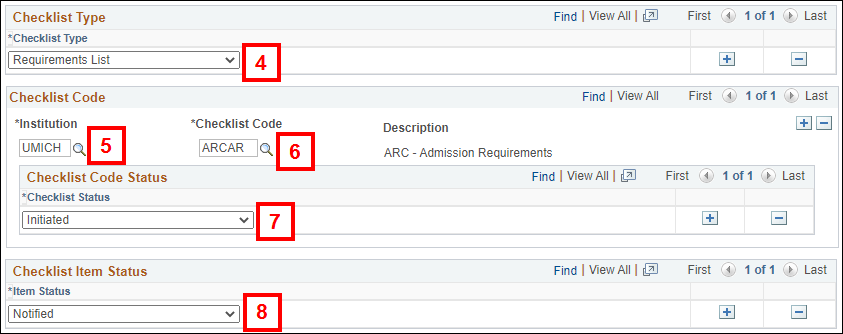
- Enter your Institution.
- Enter the Checklist Code.
- Select a Checklist Status from the drop-down menu.
- Select the Item Status from the drop-down menu.
Note: You can enter multiple Checklist Codes, Checklist Statuses and Item Statuses by clicking the Add a New Row button (+) in the applicable section.
Complete the Process
- Click Run.
View the Process Scheduler Request setup
- The Server Name is PSUNX
- The Type is Web.
- The Format is TXT.
- Click OK.
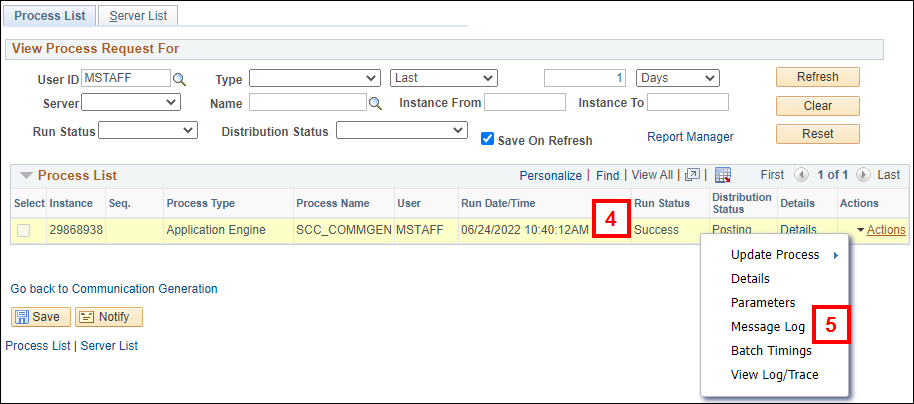
- Click the Process Monitor link.
- Verify the Run Status is Sucess.
- If the Run Status is not Success, click Refresh until the status displays.
View Process Monitor
- To verify if any of the individuals selected are missing critical data, such as email address or mailing address, click Actions and select Message Log.
- One student who is missing critical data does not stop the process from completing for the remainder of the population.
- (Optional) To view the communication sent to a student, navigate to Campus Community > Communications > Person Communications > Communication Management, and click the View Generated Communication link.
Once you have run CommGen, you should run Validation Queries as detailed in the Data Validation and Monitoring Queries document.