Overview
Once a data source and Microsoft Word template are created for your communication, you need to link them together via the Report Definition page.
Navigation
Reporting Tools > BI Publisher > Create BIP Report Definition
Step-by-Step Process
- Click the Add a New Value tab.
- Enter the Report Name.
View the Report Definition page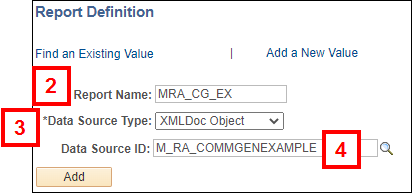
- Report Names should follow this standard convention: M
_ _ . For example, MRA_OUA_AVE, MRA_RAC_CAM, MRA_BUS_DOU - Functional Areas for Student Administration include:
- RA = Recruiting and Admissions
- FA = Financial Aid
- SR = Student Records
- SF = Student Financials
- HE = Cross Student Administration
- Report Names should follow this standard convention: M
- Select XMLDoc Object from the Data Source Type drop-down list. DO NOT allow the default value of Query to remain in this field.
- Select your data source in the Data Source ID field.
- The Data Source ID cannot be changed after the record is saved. Always verify you have selected the correct Data Source ID.
- Click Add.
Definition Tab
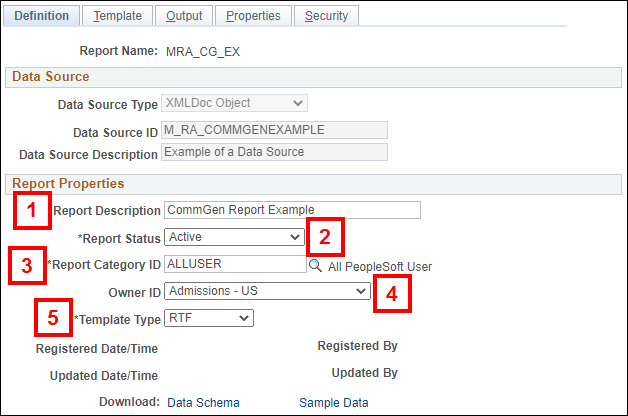
- Enter a Report Description that functionally describes the communication you are defining with this report.
- Select Active from the Report Status menu.
- Look up or enter the code that relates to your office in the Report Category ID field.
- Select the Owner ID from the drop-down list if it does not populate automatically.
- Ensure the Template Type is RTF.
Template Tab
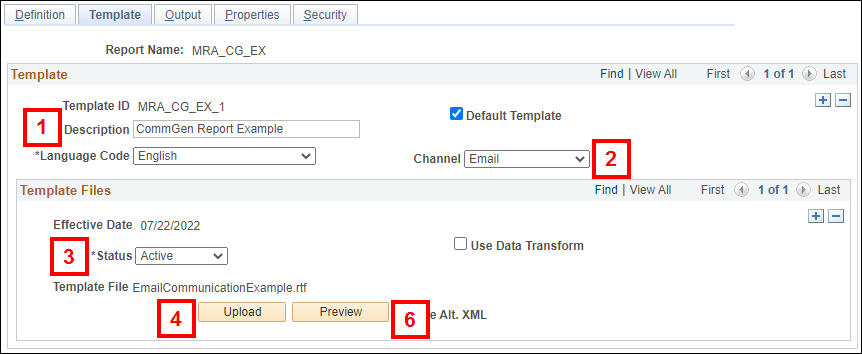
- Enter the Description. This should match the Report Description entered on the Definition tab.
- Select the communication delivery method from the Channel menu. When producing letters, select Printer. When producing emails, select Email.
- Although an email and letter cannot be produced during the same CommGen run, both an email template and letter template can be set up under the same Report Definition. This is done by adding multiple template IDs with different channel values. This may be useful for high priority communications that must be delivered even in the event of a bounced email.
- Select Active from the Status drop-down list.
- Click Upload.
- Navigate to and select your Microsoft Word BI Template.
- Click Preview to view the communication.
Notes:
- You can set up more than one template for a communication. This is useful when you need to have both an email and printed version of a communication. After completing all fields on the Template tab for the first Template ID, click the Add a Row button in the Template section of the page and complete the fields for the second template. You must set one of the templates as the default for the communication by checking the Default Template box on the appropriate template.
View Template tab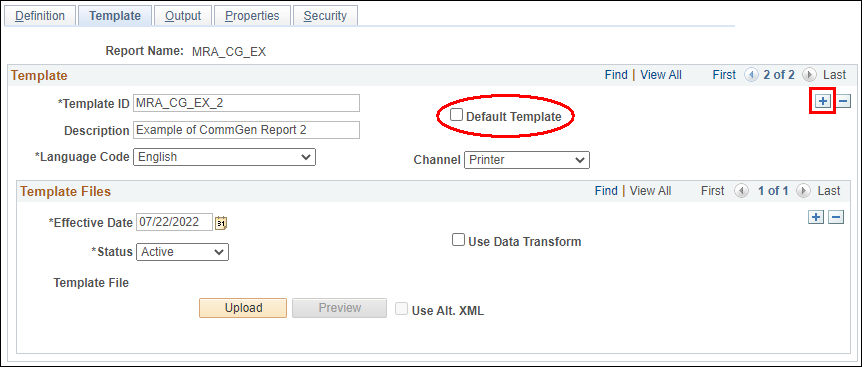
- DO NOT delete or inactivate a template once it has been used. Doing so will eliminate the ability for students and staff to view prior communication content.
- If changes are made to a template and a new version needs to be uploaded, you must add a new effective dated row within the Template files section and upload a new version of the template. The system does not allow for two templates with the same effective date. See the Upload a Revised Template section of the Creating a CommGen Template page for instructions and screen shots on this process.
Output Tab

- Always check the Default box on the PDF row.
- Ensure the Location is set to Any.
- Click Save.
Once the report definition is created, you need to update the Letter Code setup to include CommGen parameters.