Overview
This document explains the steps for adding supporting documents to a PAR (Personnel Action Request) in the M-Pathways Human Resource Management System.
All PAR transactions allow you to attach supporting documentation using the steps below. The attached documentation is saved in ImageNow in the employee's University personnel folder.
Creators can attach documents, and approvers can attach documents before approving or denying the transaction.
Creators and approvers have the ability to delete supporting documentation associated with a PAR transaction. Using this feature will permanently delete ALL documentation that has been added to a specific transaction. This functionality is available for all transaction types. Much like the Add functionality, the Delete link will only be available to the transaction creator during the creation process and to the pending approver while the transaction is in a draft or pending status. Once the transaction is fully approved and loaded, the Delete link option is no longer available.
When a transaction is deleted, the related documentation is also deleted in ImageNow. Only the creator can delete the transaction.
Navigation
Adding supporting documents begins on the PAR Details Page within an existing PAR transaction. See the Create a PAR step-by-step procedure or the Find a PAR step-by-step procedure for more information.
Step-by-Step Process
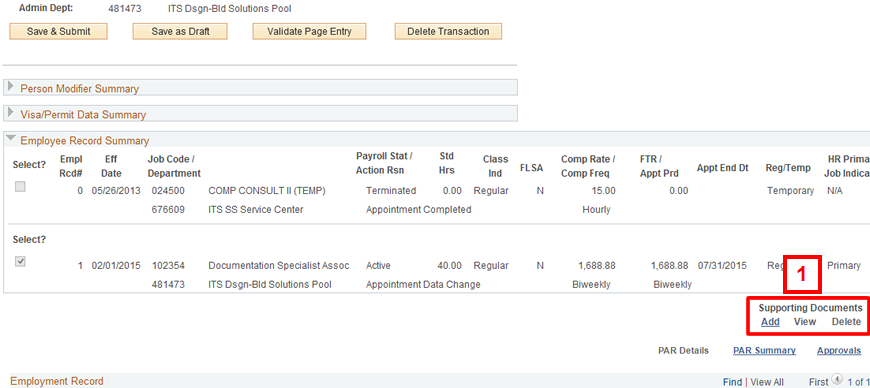
- Click Add.
- Only PDF (.pdf) and TIF (.tif) files may be added as supporting documents for a PAR.
- Each attachment has a size limitation of 7MB.
- The View link is only available if supporting documents have previously been attached to a PAR.
- Clicking View displays all attached supporting documents for a PAR in a single file.
- Clicking Delete will permanently delete ALL documentation that has been added to a specific transaction.
- Click Browse... or Choose File (Depending on browser).
- Navigate to and click the applicable file.
- Click Open.
- Click Upload.
Note: A confirmation message will display indicating the document has been saved to Imaging. The View link can be used to view the images once they are added. - Repeat steps 1-5 to attach additional supporting documents to the PAR.
PAR (Personnel Action Request) Details Page Screenshot

Note: