Overview
This document explains the steps for adding approvers to a PAR (Personnel Action Request) in the M-Pathways Human Resource Management System.
Important Information
- Approvers review/approve the transactions in the exact sequence order provided.
- Every Approver must approve the transaction before it can be posted to the employee’s record.
- You must have the proper M-Pathways role in order to be listed as an Approver (eligible employees are listed using the Lookup
 ).
). - There is a limit of 10 Approvers per transaction.
- If an employee has a funding department outside of your department, the appropriate Approver from that funding department must be added to the DBE Transaction Approvers group box.
- If the employee has multiple appointments with different final approvers, coordinate with the final approvers before beginning the transaction. See the PAR Final Approvers for Job Updates worksheet located in the HRRIS Job Aids for more information.
- If the transaction requires approval from Graduate Medical Education, Sponsored Programs, Health Systems HR, Temporary Staffing Services, Staff HR, or University Compensation, creators can find the appropriate Approver by selecting the proper area from the Approver(s) drop-down list and EmplID.
- Once a transaction is approved by the final approver, the transaction is loaded real time into M-Pathways or if the SSC HR or CENTRAL HSHR group is assigned, it will have been manually entered at time of final approval.
Navigation
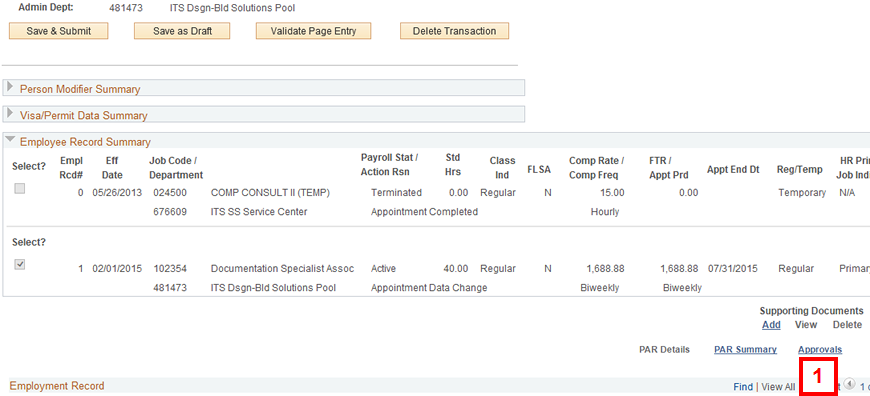
This step-by-step procedure begins on the PAR Details Page within an existing PAR transaction. See the Create a PAR step-by-step procedure or the Find a PAR step-by-step procedure for more information.
Step-by-Step Process
- Click Approvals.
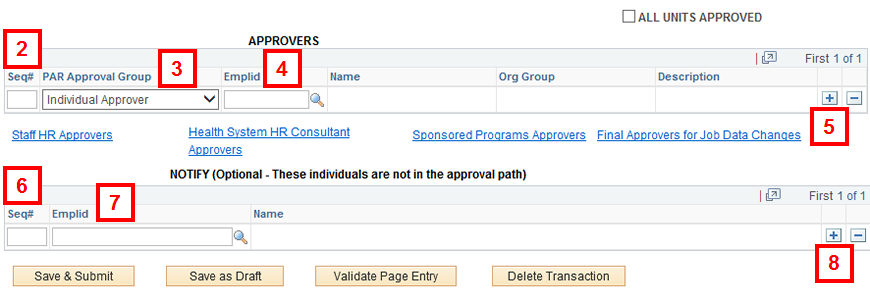
- Enter the applicable sequence number in the Seq# column.
- Approvers review/approve the transactions in the exact sequence order provided.
- If multiple units have coordinated approval outside of workflow, check the ALL UNITS APPROVED box.
- Select a value from the PAR Approval Group drop-down list.
- Enter or Lookup the Emplid.
- Click Add Row
 to add additional Approvers.
 - If the transaction requires Sponsored Programs Approvers, Staff HR Approvers, Health System HR Consultant Approvers, or Final Approvers for Job Data Changes, creators can find the appropriate approver by clicking the related link below the approvers section.
- Certain transactions require approval from the HR Service Center. In some cases the system will prompt you to add an appropriate approver, however; in others the system will automatically assign the appropriate final approver.
- Some transactions for Health System employees require an approver from that campus.
Personnel Action Request Page - Approvals Link
Notes:
Note:
Steps 6-8 are optional.
The Notify section gives you the ability to notify selected individuals (who are not listed as Approvers) when final approval for the transaction has taken place.
- Enter the applicable value in the Seq# column.
- Enter or Lookup the Emplid.
- Click Add Row to add additional people to be notified.
- Click PAR Details to continue editing the PAR.
OR
Click the applicable button(s):- Save & Submit
- Save as Draft
- Validate Page Entry
- Delete Transaction
Note: The Benefits Shared Service Center group will automatically be added to the Notify section for Process a Leave of Absence and Change Leave End Date transactions.