Important Information
- Use this report to research online (i.e., Journal ID Mask of 000) or BE journals from your Statement of Activity (SOA). These journals entries usually have fewer lines than the larger, system-batched journals (e.g., SUB journals). The more journal lines, the longer the system takes to process the report and display the data in the viewer window.
- Enter the same date in the From Date and To Date fields. System batched Journal ID numbers are recycled each Fiscal Year. If these fields are left blank, the system produces a report displaying the journal lines for each time the Journal ID number was generated. Processing time increases due to this.
This procedure assumes you have an existing Run Control ID. See M-Pathways Run Control ID Information if want to create a specific Run Control ID for a report.
This procedure assumes you are using a PC. If you are using a MAC, follow steps 1 – 12. Select Web from the Type drop-down list and PDF from the Format drop-down list to run the report to the Report Manager. See Run a Report to the Report Manager for instructions on how to retrieve and print the report from the Report Manager.
Navigation
NavBar > Navigator > General Ledger > General Reports > Journal Entry Detail
The navigation path above is the full path from the Menu. The Journal Entry Detail link is also available from the General Ledger navigation collection.
Step-by-Step Process
- Click Search to view a list of your Run Control IDs.
Journal Entry Detail Screenshot
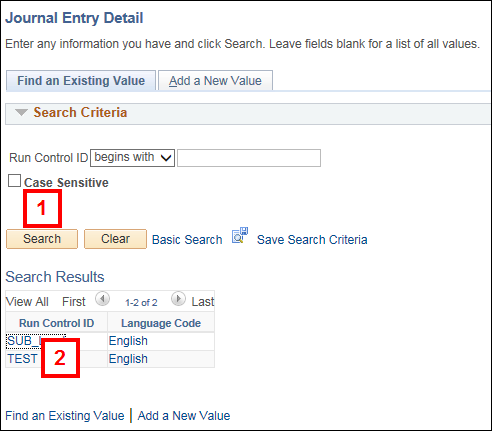
- Click the link for the applicable Run Control ID.
Note: If you know your Run Control ID, you can select = (equal to) from the Run Control ID conditions drop-down list and enter your Run Control ID in the field.
- Enter or select ACTUALS in the Ledger Group and Ledger fields.
Journal Entry Detail Report Screenshot
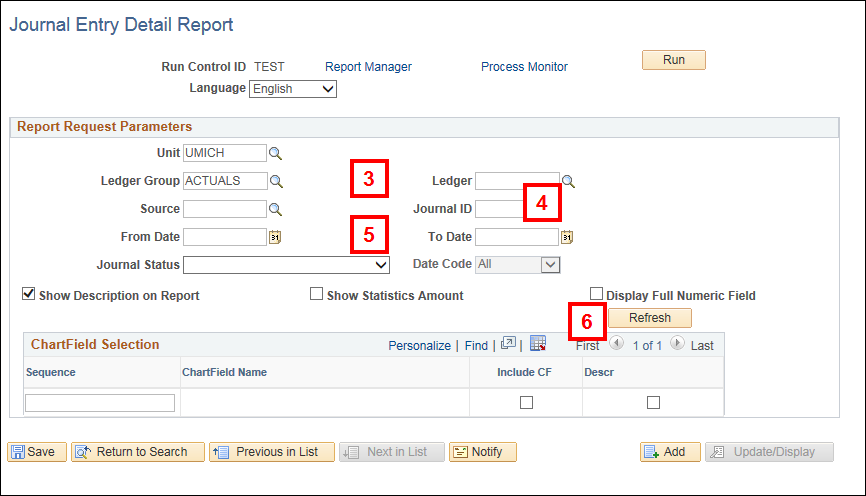
- Enter the Journal ID from the SOA report in the Journal ID field.
- Enter the Journal Date from the SOA report in the From Date and To Date fields.
- Click Refresh.
- Check the Include CF box for each ChartField that you want to appear on the report.
Note: The ChartField Selections group box contains additional options not used by the University. Select only the Account, Fund, Department, Program, Class, and Project/Grant ChartFields.
Journal Entry Detail Report Report Parameters Screenshot
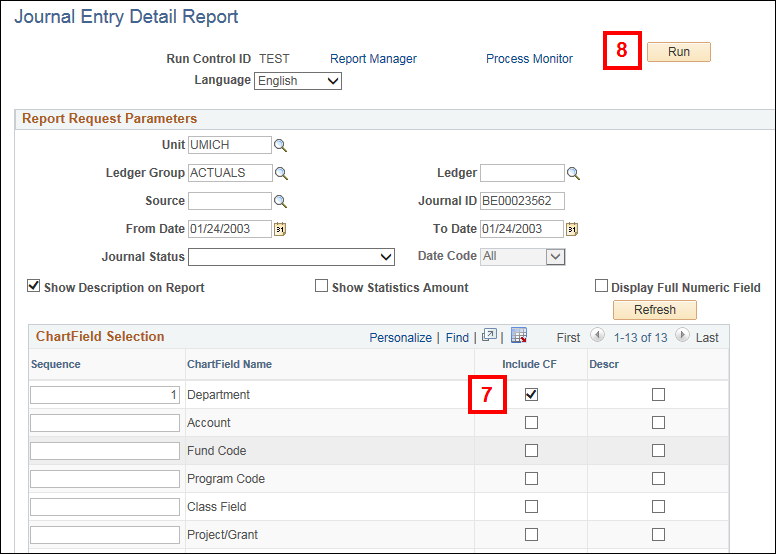
- Click Run.
- Select PSUNX from the Server Name drop-down list.
Process Scheduler Request Screenshot
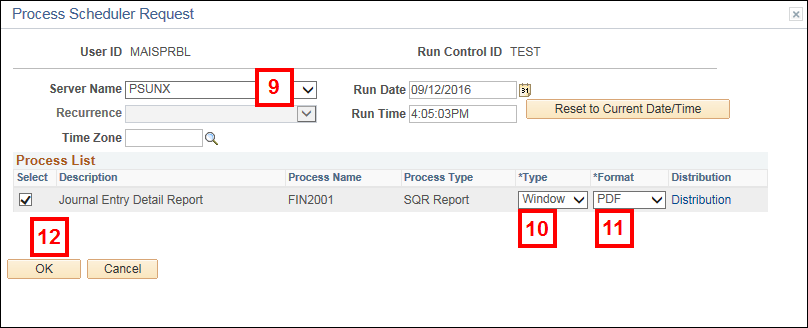
- Select Window from the Type drop-down list.
- Select PDF from the Format drop-down list.
- Click OK.
- The following status pop-up windows appear:
- Queued
- Processing
- Success (or Error)
- Verify the report displays in a separate window.
- When applicable, use the following PDF window features:
- Click the page arrows to view the report data in the window.
- Click Save to store the report electronically as a PDF file. You may choose to rename the report prior to clicking Save on the Save a Copy… dialog box.
- Click Print in the report window; then click OK in the Print dialog box.
- Click Close in the upper-right corner of the report window to close the report.