Overview
If your unit maintains budget lines with a specific dollar amount (not $0.00), use this procedure to transfer funds among budget lines.
Important Information
Contact your U-M Accounting Services Coordinator:
- Prior to entering a budget transfer for a sponsored project/grant to verify if applicable.
- If you have questions about a Ledger Group’s budget definition (e.g., budget keys, translation rules, etc.).
Look up your unit’s coordinator(s) using the Sponsored Programs Coordinator by Department spreadsheet on the Financial Operations website.
Navigation
NavBar > Navigator > Commitment Control > Budget Journals > Enter Budget Transfer
Step-by-Step Process
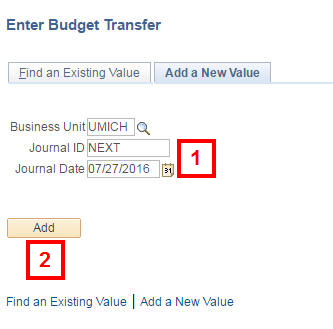
- Enter, select, or accept the default Journal Date.
Note: Verify that NEXT defaults in the Journal ID field. This value allows the system to auto-assign the next available Journal ID number when you save the budget journal transaction.
- Click Add.
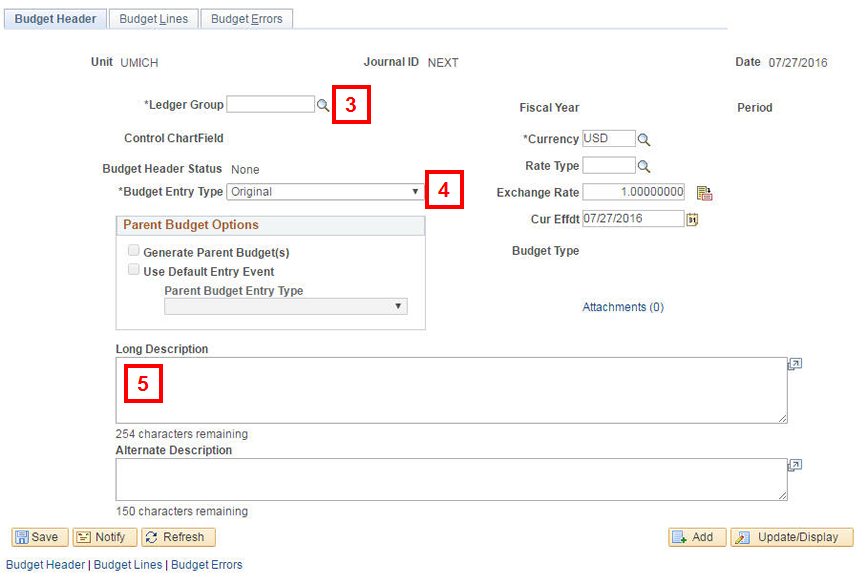
- Enter or Lookup
 the Ledger Group.
 - Select a Budget Entry Type from the drop-down list.
- Original
- Adjustment
- (Optional) Enter a Long Description .
Note: Verify whether or not your organization is using this field for specific business process reasons.
- Click the Budget Lines tab.
Notes:
- You can click Show All Columns
 to view all columns without a scrollbar.
 - Either the Program or Project/Grant field appears based on the selected Ledger Group.
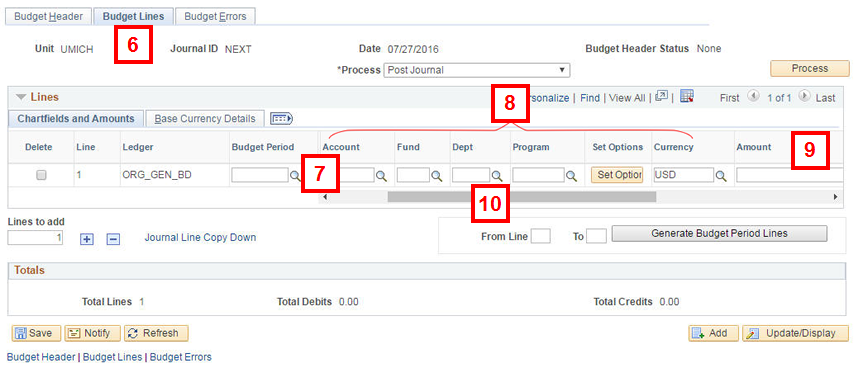
- You can click Show All Columns
- Enter or Lookup the Budget Period.
- Enter or Lookup applicable ChartFields.
Notes:
- Use account values beginning with 8 for a revenue budget line.
- Use account values beginning with 9 for an expense budget line.
- Enter the Amount for the budget line.
Note: Enter a negative number for a credit or a positive number for a debit.
- If applicable, use the horizontal scroll bar or press Tab to move to the remaining fields for the budget journal line.
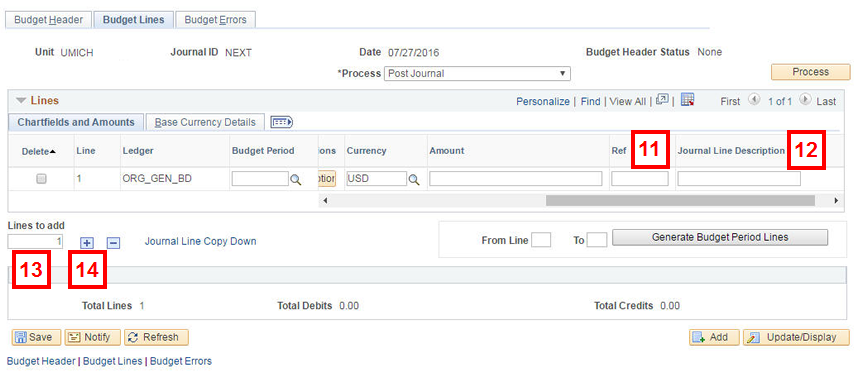
- If applicable, enter a departmental reference for the budget line in the Ref field.
- If applicable, overwrite the Journal Line Description.
- Enter the number of Lines to add.
- Click Add Row
 .
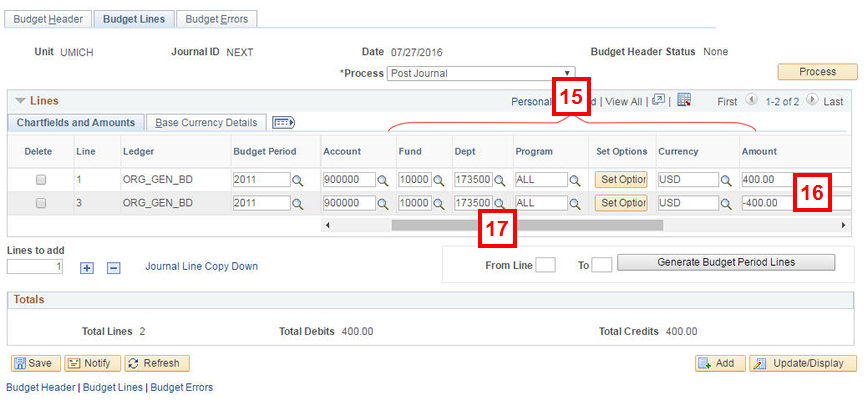
. - Overwrite applicable ChartFields for the new line(s).
- Overwrite the Amount for the new line(s) (e.g., add the minus sign to indicate the “to” line).
- If applicable, use the horizontal scroll bar or press the Tab key on your keyboard to move to the remaining fields for the budget line(s).
- If applicable, enter a departmental reference for the budget line in the Ref field.
- If applicable, overwrite the Journal Line Description
Note: Repeat steps 15 – 19 for each line added.
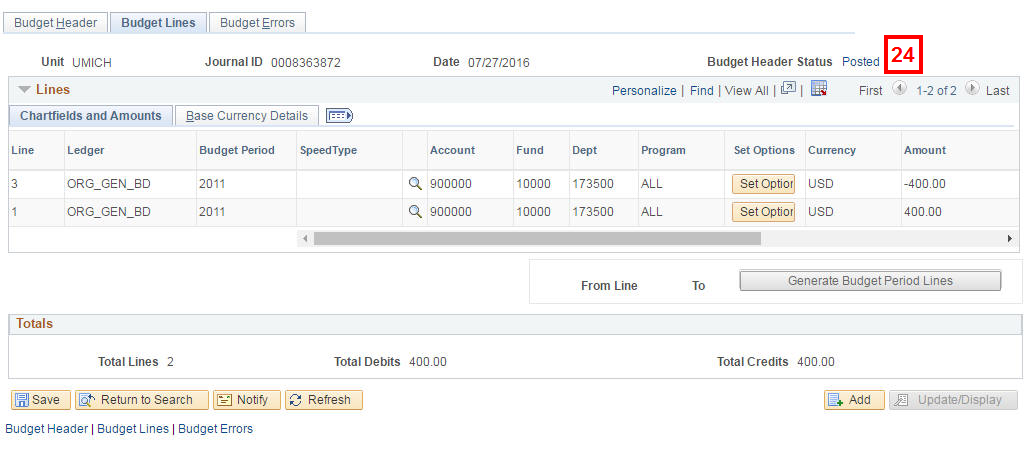
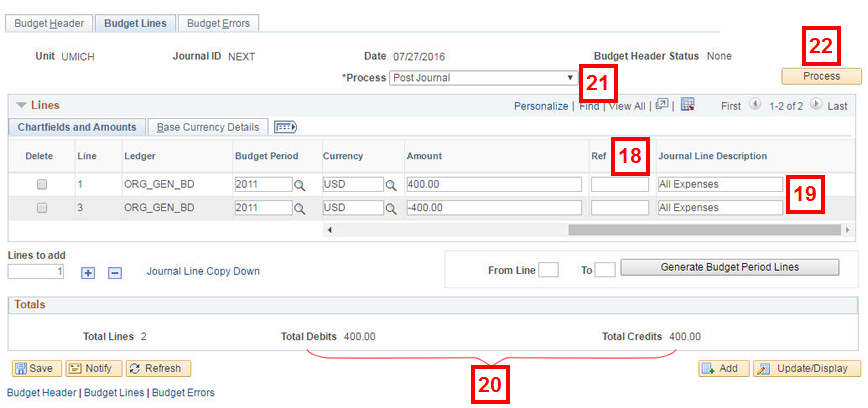
- Verify that the Total Debits amount equals the Total Credits amount in the Totals group box.
- Select Post Journal from the Process drop-down list.
- Click Process.
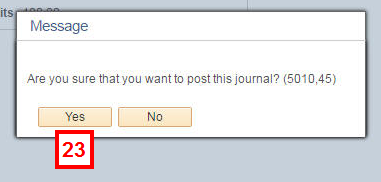
- Click Yes.
- Verify that the Budget Header Status is Posted.
Notes:
- After the budget journal has been posted, some fields and buttons turn gray to indicate that additional changes cannot be made to the journal.
- Note the Journal ID number for your records.
Add a New Value Page Screenshot
Note: Refer to the troubleshooting section of Enter a Budget Journal if the Budget Header Status value is Error.