Overview
This procedure provides the basic steps for entering a Budget Reallocation in M-Pathways. An additional Budget Reallocation procedure is listed in the Related Documentation.
Important Information
- A Budget Reallocation can only be updated by the person who created it and Sponsored Programs.
- Before beginning, scan and save all supporting documents needed for the transaction. Only PDF (.pdf) and TIF (.tif) files can be added as supporting documentation. File names cannot be longer than 65 characters. Each attachment has a size limitation of 10MB.
Navigation
NavBar > Navigator > Commitment Control > Budget Reallocation > Create New Budget Reallocation
Step-by-Step Process
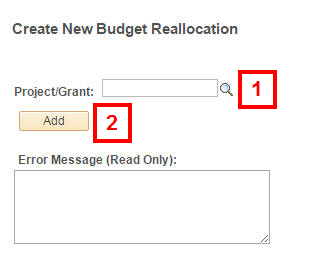
- Enter the Project/Grant.
Notes:
- Only can be used for sponsored projects.
- Enter the Parent Project/Grant number when reallocating funds between Parent/Sub Projects/Grants.
- Click Add.
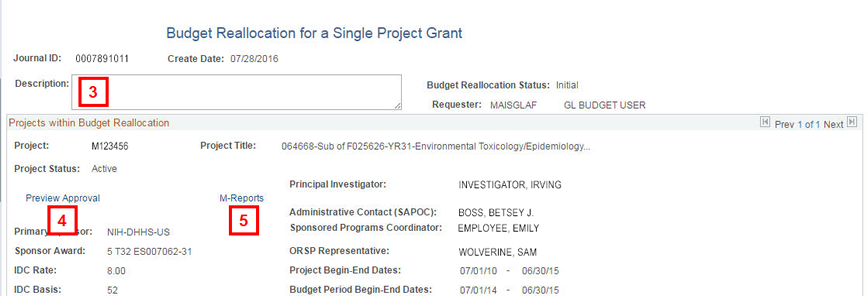
- If applicable, enter a Description.
- If applicable, click Preview Approval to view the approval path for the Budget Reallocation.
- If applicable, click M-Reports to view the Project/Grant Budget Status Report.
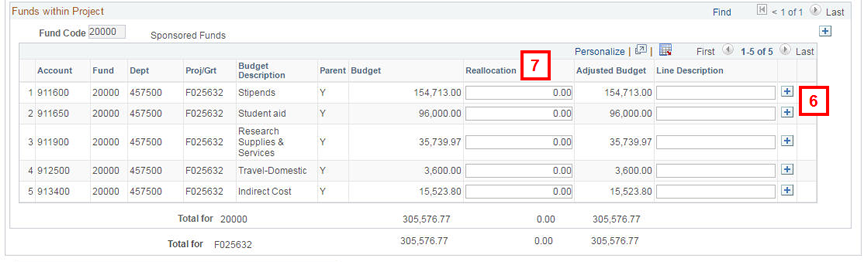
- If applicable, click Add Row
 to add a new budget line.
Note: An Account and Department value must be entered for each added line.
- Enter changes to applicable fields in the Reallocation column.
Note: You may reallocate funds to/from a parent project to/from a sub-project.
- Click Calculate IDC or enter Indirect cost manually.
Note: Calculate IDC is only available when the IDC basis is 50 or 19.
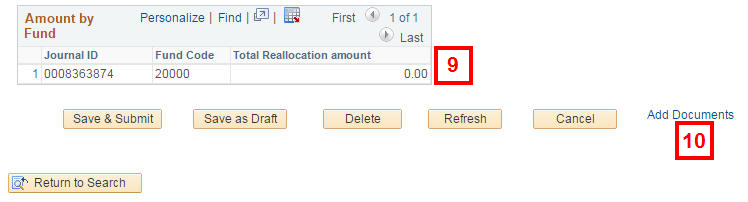
- Verify that all Fund Codes display a net value of 0.00 in the Total Reallocation amount column.
- To add supporting documentation to the Budget Reallocation, click Add Documents. Otherwise, go to step 15.
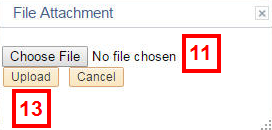
- Click Choose File.
- Navigate to select the applicable file.
Note: Only PDF (.pdf) and TIF (.tif) files can be added as supporting documentation. File names cannot be longer than 65 characters. Each attachment has a size limitation of 10MB.
- Click Upload.
- Repeat steps 10 – 13 until all supporting documentation has been attached to the Budget Reallocation.
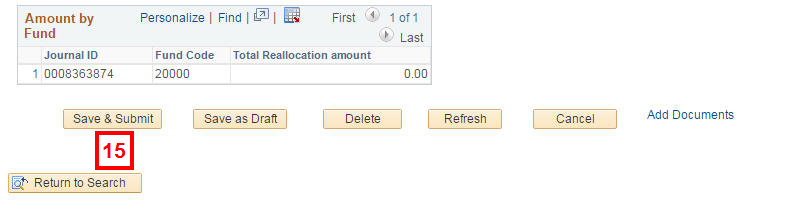
- Click Save & Submit to begin the approval process.
OR
Click Save as Draft to save and resume editing/submiting at a later time.
OR
Click Delete to permanently delete the budget allocation form.
OR
Click Refresh to update the budget allocation form with changes entered by other users.
OR
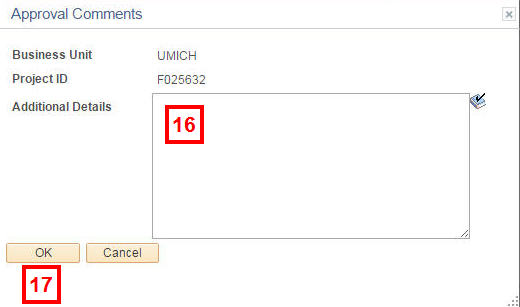
Click Cancel to discard any changes made since the last save. - If applicable, enter approval comments in the Additional Details field.
- Click OK.
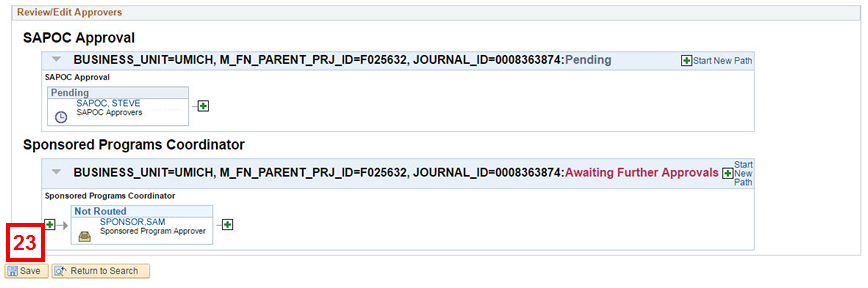
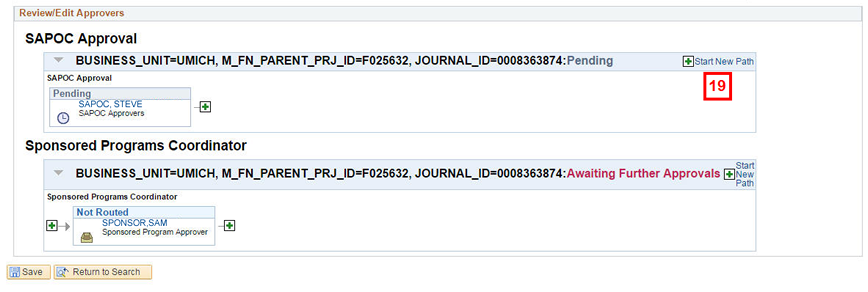
- Review the approval workflow.
- To add an approver, click Start New Path.
Notes:
- Only individuals that are already part of the approval workflow can add additional approvers.
- This is the preferred method to add approvers. It allows approvers to approve the transaction simultaneously. Clicking Plus next to an existing approver’s name is not preferred. It requires the new approver to wait in sequence to approve the Budget Reallocation.
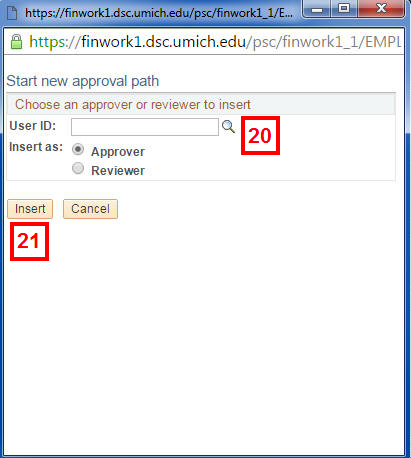
- Enter or Lookup
 the additional approver's uniqname in the User ID field.
Note: Always ensure that Approver is selected.
- Click Insert.
- If applicable, click View/Hide Comments
 to review other approvers' comments.
- Click Save.
Note: You must click Save to have the new approvers added to the Workflow.
Add a New Value Page Screenshot
Budget Reallocation Page Screenshot
Budget Reallocation Page (cont.) Screenshot
Budget Reallocation Page (cont.) Screenshot
File Attachment Page (cont.) Screenshot
Budget Reallocation Page Screenshot
Budget Reallocation Page (cont.) Screenshot
Budget Reallocation Approval Page Screenshot
Budget Reallocation Page (cont.) Screenshot
Budget Reallocation Page (cont.) Screenshot