Important Information
Batch Class Roster Reports are run for multiple classes. Refer to Use the Class Roster to run a Class Roster for one specific class.
Navigation
Main Menu > Curriculum Management > Class Roster > Print Class Roster
Step-by-Step Process
- Click Search.
- Select the desired Run Control ID from the search results. Go to step 6.
- Click Add a New Value.
- Enter the Run Control ID.
- Click Add. Go to step 6.
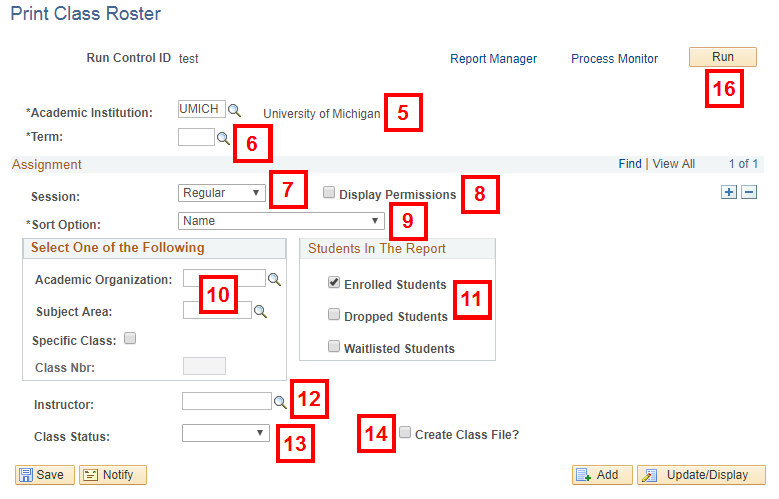
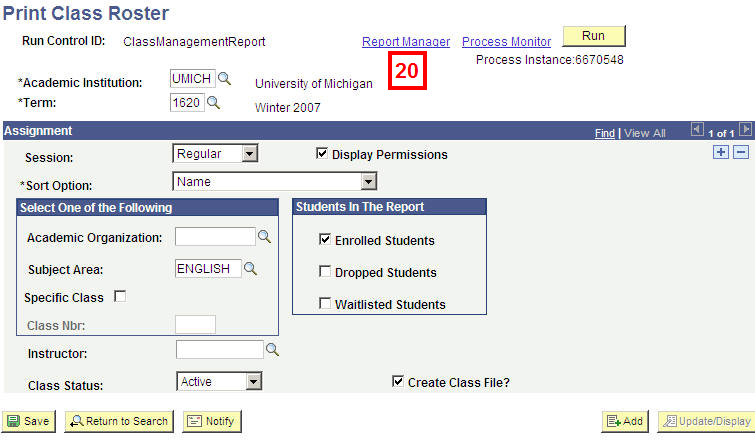
- Verify UMICH displays in the Academic Institution field.
- Select a value from the Term drop-down list.
- Select a value from the Session drop-down list.
- If desired, check the Display Permissions box to view permissions in the report.
- Verify Name displays in the Sort Option field.
- Enter either the Academic Organization or the Subject Area.
- Check the Enrolled Students and/or Waitlisted Students boxes in the Students in The Report box.
- At least one value must be selected.
- Including
Enrolled Students
andDisplay Permissions
may result in duplicate student information. The information in the report is accurate, but students with permissions may display twice. - Including Dropped Students in the Class Roster Report is not necessary because dropped students are not tracked in this system.
- If desired, enter or Lookup an Instructor EmplID in the Instructor field.
- Select the Class Status you want to include in the report. Valid Values include:
- Active
- Cancelled
- Stop Enrl (Stop Enrollment)
- If desired, check the Create Class File? box to generate a Batch Class Roster Report csv file (used to import Batch Class Roster Report into Excel) for each class returned based on the run control criteria.
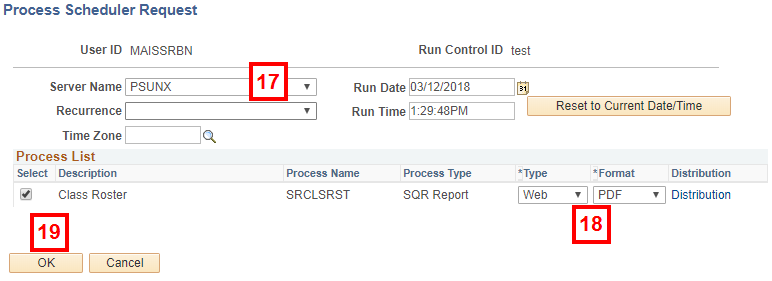
- Click Run. The Process Scheduler Request page displays.
- Select PSUNX from the Server Name drop-down list.
- Verify Web is selected in the Type field and PDF is selected in the Format field.
- Click OK. You will automatically be taken back to the Print Class Roster page.
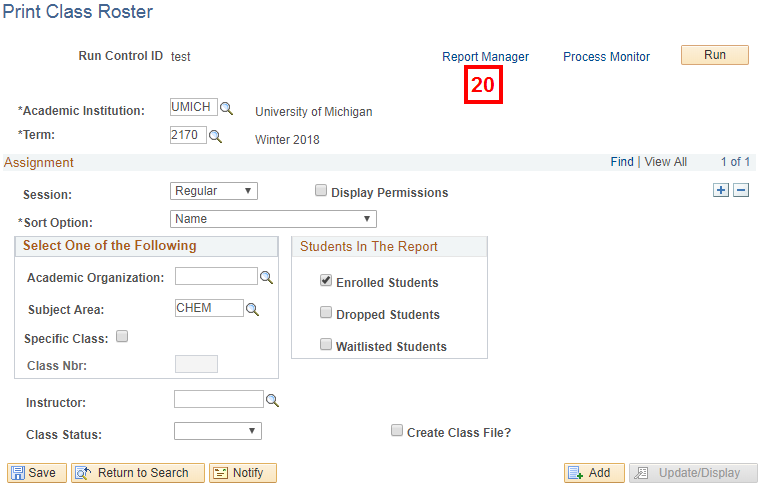
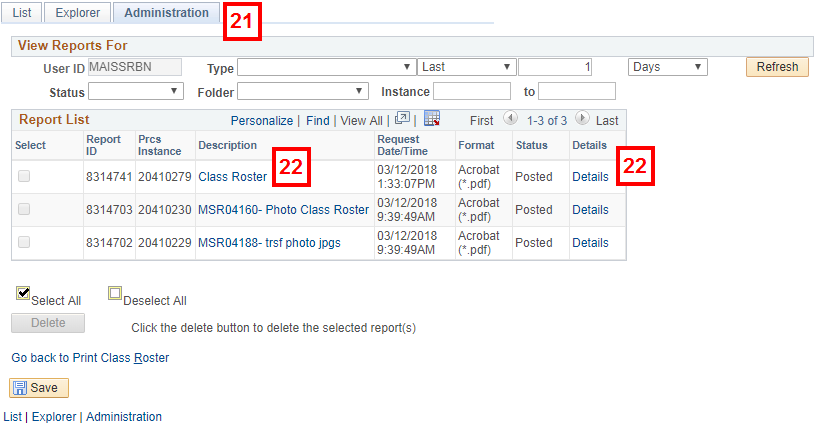
- Click Report Manager.
- The Report List Page will appear. Click the Administration page tab.
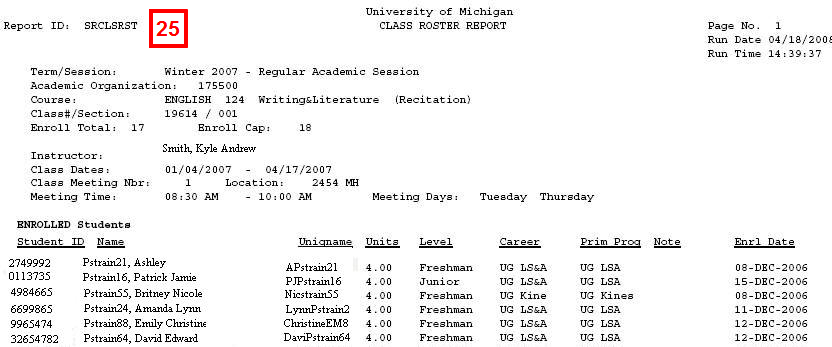
- To view the Batch Class Roster Report from the .PDF file, click Class Roster in the Description column.
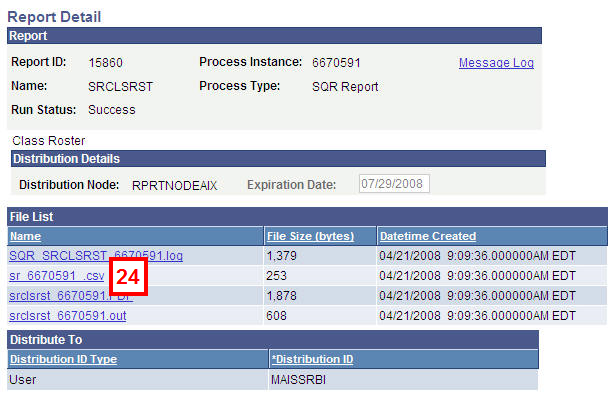
- To view the Batch Class Roster Report in Excel, click Details. The Report Detail page displays.
- Click on the csv file link to open the Batch Class Roster Report in Excel.
- View the Batch Class Roster Report and print it from the .PDF file. Click X to close the .PDF file.
To use an existing Run Control ID, go to step 1.
To add a new Run Control ID, go to step 3.
Note: The Run Control ID is associated only with your Operator ID. It is helpful to assign the Run Control ID a name that is easy to remember so that you can find and reuse the Run Control ID in the future (e.g., ACCClassRosters).
Note: The Batch Class Roster Report cannot be run using just Display Permissions. A checkbox must also be selected in the Students In The Report box.
Notes:
Process Scheduler Request Page
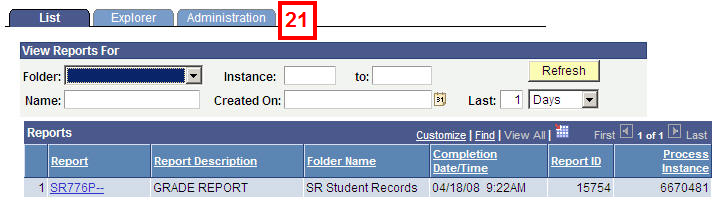
Note: If the Status of the report reads Processing, click Refresh until the Status reads Posted.
Note: The .PDF file will be launched in a new window.

Note: The Report List page is still open in the original window. Use your explorer to return to the Report List page.