Overview
The Access Validation Audit Report dashboard in Tableau provides access and role information, including secondary security, for each member of your department for the following administrative systems:
- M-Pathways Student Administration
- M-Pathways Human Resource Management System
- M-Pathways Financials & Physical Resources System
- U-M Data Warehouse
- M-Reports
- DART (Donor & Alumni Relationship Tool)
Notes:
- eResearch is not included.
- Locked users are excluded from the reports.
The four tabs included in the Access Validation Audit Report dashboard:
- Job Change
- Review this tab every month.
- Users appear on this tab when they have moved departments - either new to the department or have left the department or have had a change in job status.
- Identifies users who may need access changes.
- Tip: Use the Last 2 Months to Today filter. Then:
- Click each person in the list.
- Review to ensure selected user has the correct access.
- Review to ensure the selected user does not have any department specific access that should be removed.
- Promptly remove access for individuals no longer in your department, and adjust access for those starting new roles.
-
All Employees
- Review this tab biannually.
- Use this tab to review every user in a department or compare particular users, as needed.
- Use this tab to view roles and secondary security for users.
- It is recommended you use the Save Custom View(s) (see below) feature. This tab can take a while to load.
- Tip: Use the Current Unit Primary Liaison Set filter, then make it a default view when you save the custom view.
- All Employees by Role
- Review this tab as-needed
- This tab is blank upon entry, use the filters and click Apply after each selection.
- Use this tab to compare cross-departmental by role.
- Review this tab as-needed
- Former Employees with Security Role(s) - ITS Internal Use Only
- No UL expectations
Important Information for Non-Employees Appearing on Reports
-
Retired employees that came back as contractor (not Temp.) appear on the Job Change tab for 12 months.
- Contractors (never an employee) do not appear on Access Validation Audit Report.
Step-by-Step Process
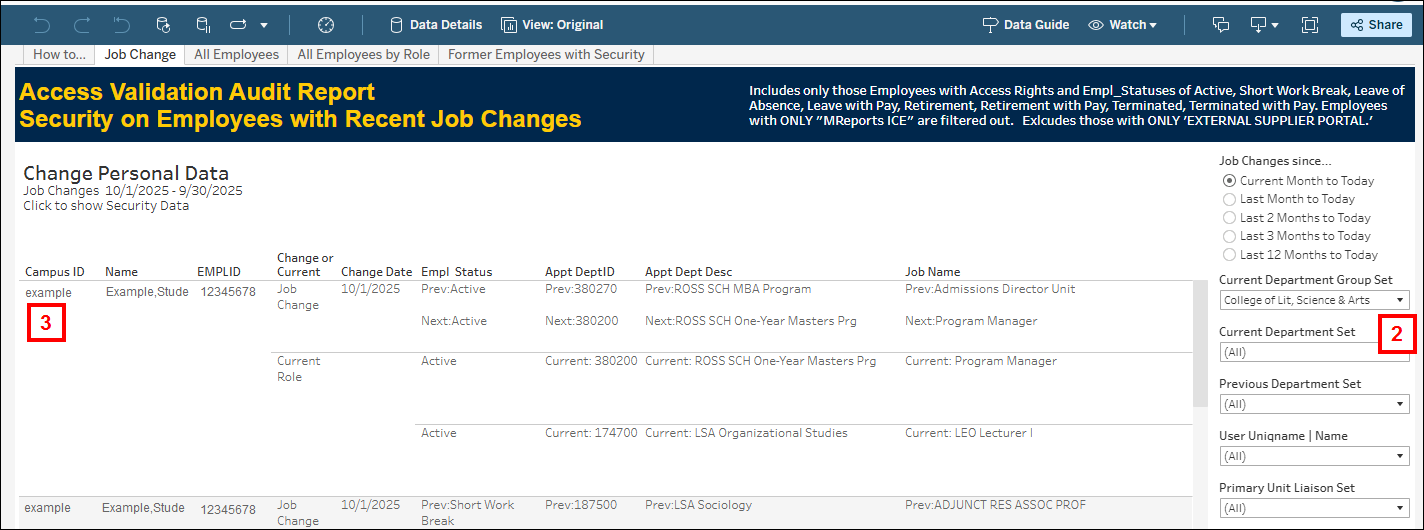
- Click the desired tab from the dashboard in Tableau (see above for descriptions for each tab).
- Select a value(s) from the drop-down lists in the filters section on the right side of the page.
- Click Apply after each filter is selected.
- Click a value in the Campus ID field to see further information.
- Review the data and adjust the filters as needed.
- If needed changes are identified, use the Online Access Request System (OARS) to make adjustments.
Access Validation Audit Report Security on Employees with Recent Job Changes screenshot
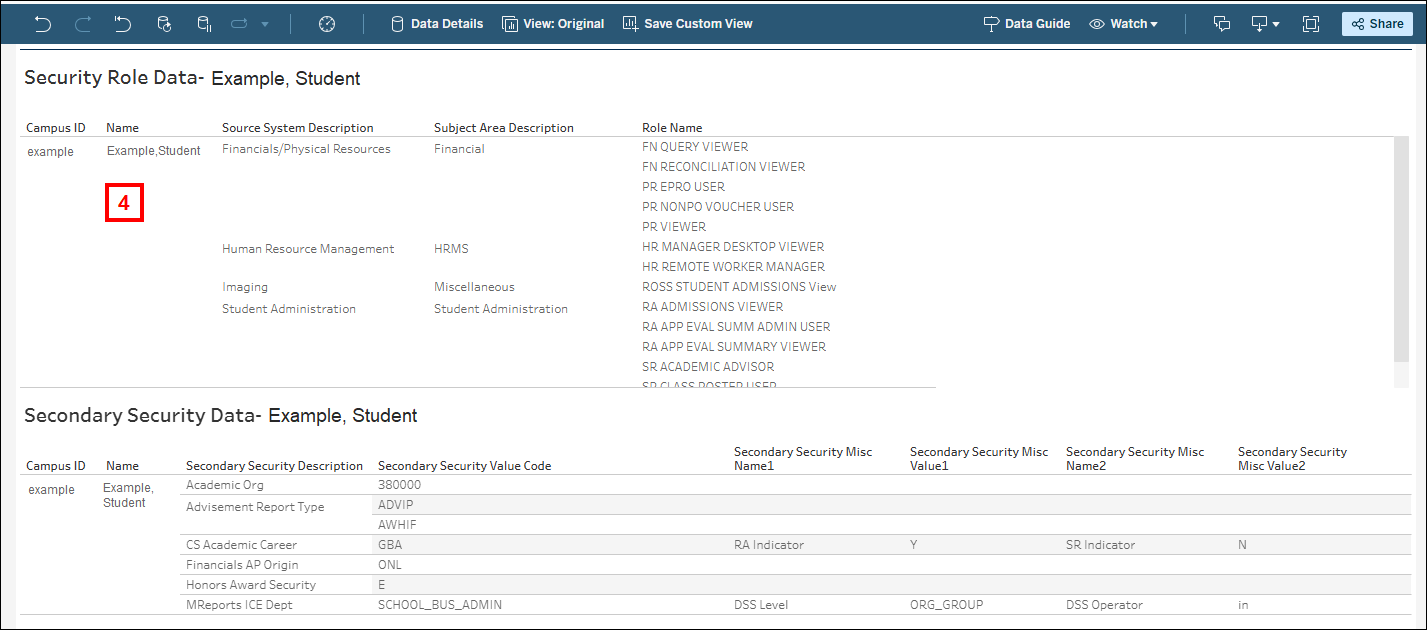
Security Role Data and Secondary Security Data screenshot
Save Custom View
A Custom View provides a convenient way to save and quickly access a specific configuration of filter selections, and sorting within a tab. Custom views do not alter the underlying data or content of the report. Use this feature if you regularly apply the same filters each time you view a tab. Multiple custom views can be created. If you want a report to open to a particular custom view, you can set it as the default view.
- Once you have finalized the filters, click Save Custom View.
- The Save Custom View button only appears after filter(s) have been applied to the report.
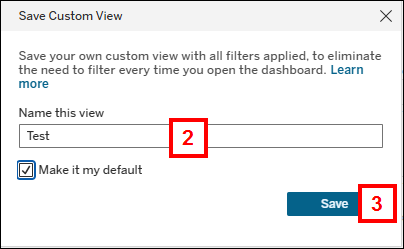
- Enter the Name this view.
- If desired, check the Make it my default box.
- If the Make it my default box is checked, this custom view opens when you return to this tab.
- Click Save.
- The name of the custom view displays on the toolbar.
- Repeat steps 1-4 to create additional custom views.
- You can save multiple custom views, but only one can be checked Make it my default.
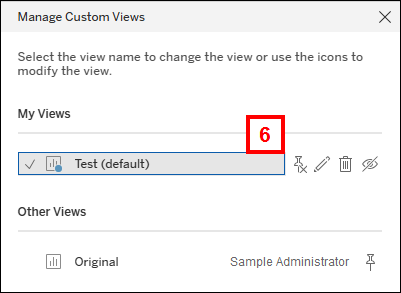
- To switch between views, click on the current View: button on the toolbar.
- The Manage Custom Views box appears.
- The My Views section contains any saved Custom Views by you.
- The Other Views section contains the original tab view and public custom views created by other users.
Save Custom View in Toolbar screenshot


Manage Custom Views screenshot
Download Data
- Select the data you want to download.
- To select a single user, click the applicable value in the first column.
- To select multiple users, click the first value in the first column, scroll down and press Shift and click the last value in the first column that you wish to include.
- The Job Change and All Employees tabs, by default, export all available data. For the All Employees by Role tab, you must first highlight the data you wish to download.
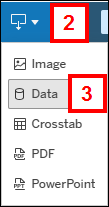
- Click Choose a format to download button.
- Click Data.
- This will export the data used in the view without formatting.
- Select Crosstab to download the data with some formatting that matches how the data is displayed on the dashboard (e.g., it might include merged cells).
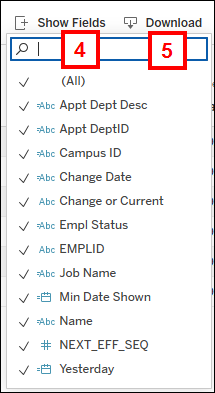
- If applicable, click Show Fields.
- The Show Fields drop-down allows you to select and unselect specific columns that will be included in the download. Checked fields are included in the report.
- Click Download.
- Retrieve your report from your web browser Download section or from your Download section of your File Explorer.
Show Fields and Download screenshot