Important Information
- This step-by-step procedure provides instructions for applying an employee's schedule and then making changes as necessary to account for variations to the schedule. If you are only reporting variations to an employee's time, you will skip the steps associated with applying or changing scheduled time.
- Monthly employees are not required to report their regular hours.
- Monthly employees and timekeepers can select the NOV Time Reporting Code (TRC) for employees with no variations in the month. NOV only needs to be reported once for the month.
- Biweekly time can be reported on a timesheet by entering the hours, amounts, and Time Reporting Codes (TRCs) manually, or by applying an employee's M-Pathways Time and Labor schedule and editing the scheduled time as necessary.
- In some cases (e.g., monthly employees who receive shift premium), it may be more efficient to assign an M-Pathways work schedule and report both regular hours and variations to regular hours. Then, an employee's time is reported on the timmesheet by changing reported/applied time as needed. Only some departments set up M-Pathways Work schedules. For more information, visit the View and Assign a Work Schedule for an Employee document.
- Interface timekeepers will use the Enter Time page page (if necessary) to:
- Make last minute changes to time reported via an interface, or
- Manually report time for employees not included in the interface.
Navigation
Homepage: Payroll or HRMS, Tile: Time Entry Pages > Enter Time
or
Homepage: Payroll or HRMS, Tile: Time & Labor WorkCenter > Enter Time
Step-by-Step Process
- Find employee/groups of employees.
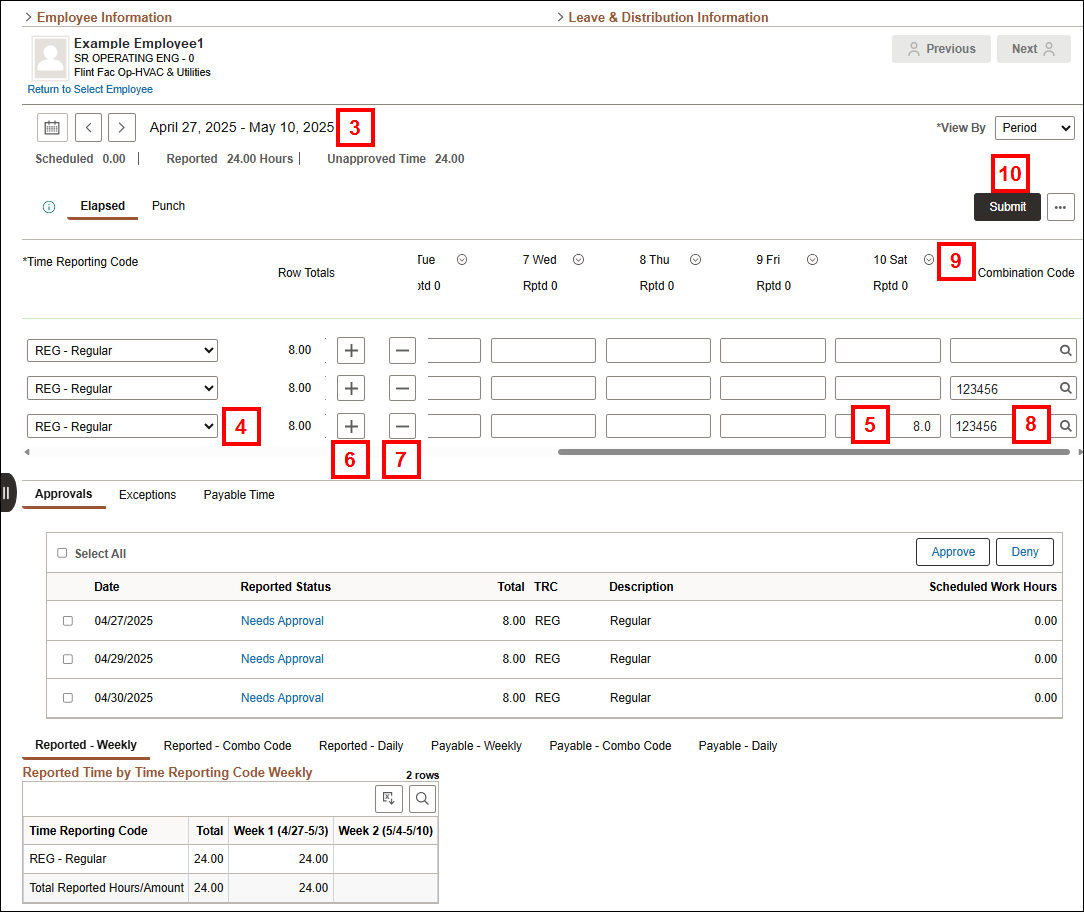
- By default, the current period opens. To change, select or enter the pay period start date in the As of Date field, and then click Apply.
- Filter allows you to enter specific filters (Time Reporter Group, Supervisor ID, Employee IDs, etc.) to retrieve employees.
- Get Employees uses the values selected in Manager Search Options.
- Click Manager Search Options and enter and save your specific filters so you can skip Filter and click Get Employees to go directly to entering, reviewing and approving time.
- To sort the search results by Name, Title, Exceptions, or Hours to be Approved, click Sort.
- Click the applicable line under the Name/Title column.
- Several rows may display for an employee if they have multiple jobs.
Enter Time
- By default, the period including the date from the As of Date field opens.
- To change:
- Click the applicable Next or Previous arrows.
- To change the timeframe displayed, use the calendar to pick a date to display the week(s)/period/month associated with that date.
- You can start the week(s) view with any day of the week, select Weekly or Bi-Weekly from the View By drop-down list and select the date from the calendar.
- If Monthly is selected from the View By drop-down list, the month starts on the date selected.
- To change:
- Select a Time Reporting Code from the drop-down list.
- Enter the applicable hours or amounts in the Date field(s).
- For each additional TRC, click Add Row and enter the appropriate values.
- To delete a row, which includes all hours or amounts for a TRC, click Delete Row.
- This does not save the deletion; it only confirms that you want to delete the row. You will have to save the deletion using the Submit button on the page.
- To charge all hours/amounts in a TRC row to a different Combo Code (shortcode) than what is listed in the Leave & Distribution section, enter or Lookup the applicable value in the Combination Code field.
- Comments may be added to any date of reported time by clicking Related Actions and Add/View Comment. Comments added are permanently added to the employee's record in the system.

Note: To apply an employee's M-Pathways work schedule (including shift), click Apply Schedule and skip to step 10. Only some departments set up M-Pathways Work schedules. For more information, visit the View and Assign a Work Schedule for an Employee document.
Submit and Review the Reported Time Status
- Click Submit to submit the reported/applied time.
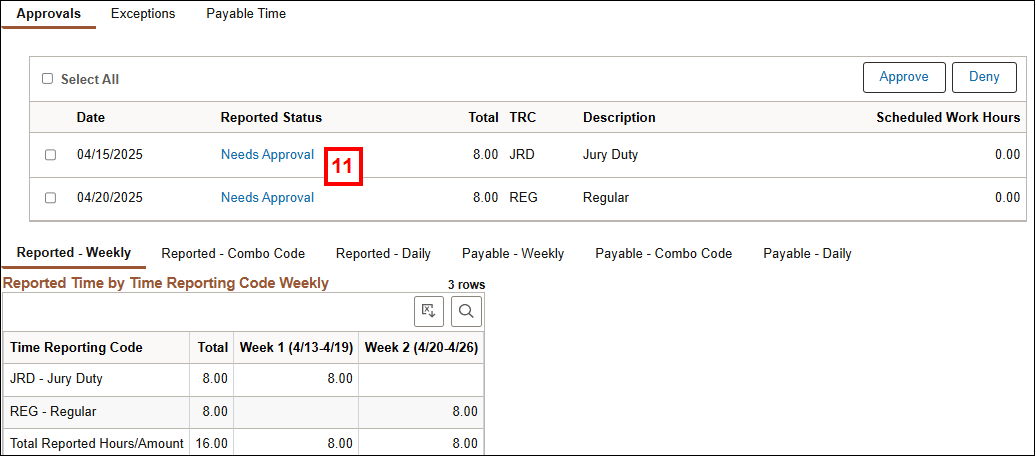
- After you click Save or Submit, you will see the information updated in the Manage Approvals and Reported Time Period Summary sections:
- To view the Approval Chain, click the Reported Status.
- From the Approval Chain, click Multiple Approvers to view a list of everyone who can approver the reported time.
- Click X to close.
- If applicable, click Next to continue to the next employee in search results list.

Note: If you'd like to view a complete pay period summary for the employee, use the Time Summary page.