Overview
There are 2 parts to creating a PAR (Personnel Action Request):
Part 1: Create a PAR: The first steps that all PAR transactions begin with.
Part 2: Individual PAR Transaction Type: Steps vary by the type of PAR transaction being created.
This procedure is Part 2. It outlines the steps for completing a PAR: Additional Pay Change.
If you are making changes to multiple employee records or PAR transactions, see the Navigate Between Multiple Employee Records/PAR (Personnel Action Request) Transactions step-by-step procedure for more information.
Important Information
- Before beginning this step-by-step procedure ensure you have collected the following information:
- Earnings
- Shortcode
- Effective Date
- Earnings Amount
- End Date
- Required approvers
- Two separate transactions must be processed if modifying dates and processing a new additional pay on the same earnings code.
- Reference the University’s Internal Controls Employment Written Procedure Templates on the following subjects for more information:
- Additional Pay
- Supplemental Pay
- Incentive Pay
- Refer to Additional Pay Earnings Codes/Definitions.
- For a list of payroll cutoffs/deadlines, see Payroll Cutoffs/Deadlines on the Payroll Web site.
- Refer to PeoplePay for payment requests for special compensation situations such as stipends.
Navigation
This step-by-step procedure begins on the PAR Details Page within an existing PAR transaction.
Step-by-Step Process
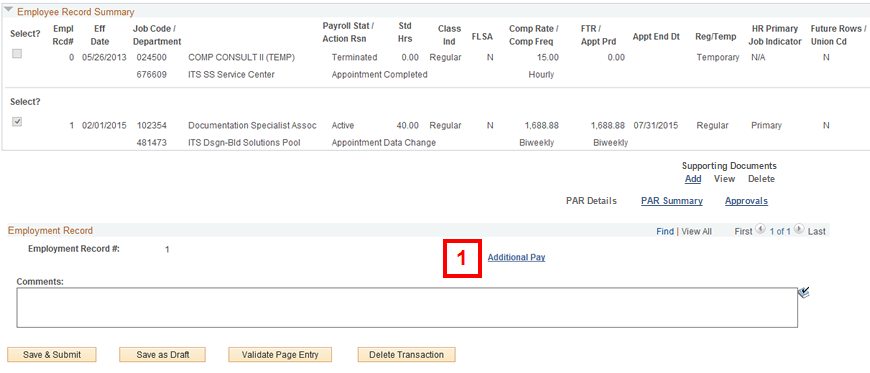
- Click Additional Pay.
- To change the Earnings Detail for an existing Earn Code including the Effective Date, click the applicable Earn Code and follow Steps 3-11.
PAR Details Page - Additional Pay Change Screenshot
Only click an existing Earn Code if you need to change the effective dates of that transaction. If you are adding a new workflow transaction with the same Earn Code (not within the effective dates for an existing Earn Code listed), click Create New Add’l Pay Trans.
OR
To create a new Additional Pay Transaction, click Create New Add’l Pay Trans and follow Steps 12-20.
Additional Pay Change Screenshot

Change the Earnings Detail for an existing Earn Code
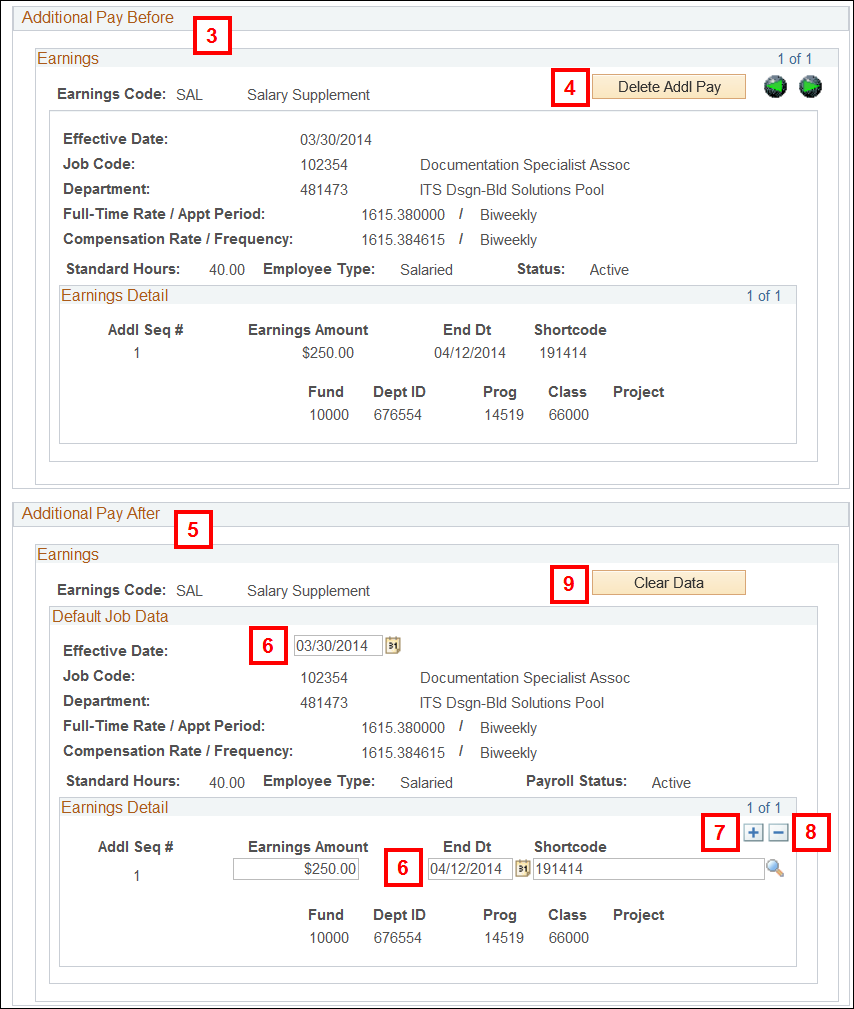
- Review the Additional Pay Before section.
- If applicable, click Delete Addl Pay to delete an existing Earnings row.
- Review the Additional Pay After group box.
- If applicable, make changes to the following available fields:
- Effective Date (Beginning of Pay Period)
- Earnings Amount
- End Dt (Ending of Pay Period)
- Shortcode
- If applicable, click Add Row
 in the Earnings Detail group box and enter the new Earnings Amount, End Dt, and Shortcode.
 - If applicable, click Delete Row
 in the Earnings Detail group box to remove a Shortcode.
 - To remove data, click Clear Data.
- Enter Comments.
- Complete the PAR:
- If applicable, Add Supporting Documents
- Add Approvers
- If the transaction requires Sponsored Programs approval, creators can find the appropriate Approver by clicking the Sponsored Programs Approvers link.
- If the Shortcode has a Chartfield fund of “20000” or “25000”, you must select an appropriate approver from Sponsored Programs.
- Save, Validate, or Delete the PAR
Note: If you are completing a workflow with multiple Earnings, use Previous  and Next
  to toggle through the Earnings.
Additional Pay Change (Existing Earn Code) Screenshot
This removes the Earnings row from Additional Pay.
Note: When deleting an existing Earnings row, the Additional Pay Before group box remains the same. The Additional Pay After displays blank fields, which cannot be updated.
Note: Use Clear Data to remove the current transaction. If you have multiple transactions, Clear Data only removes the one that is currently displayed.
Notes:
Create New Additional Pay Transaction
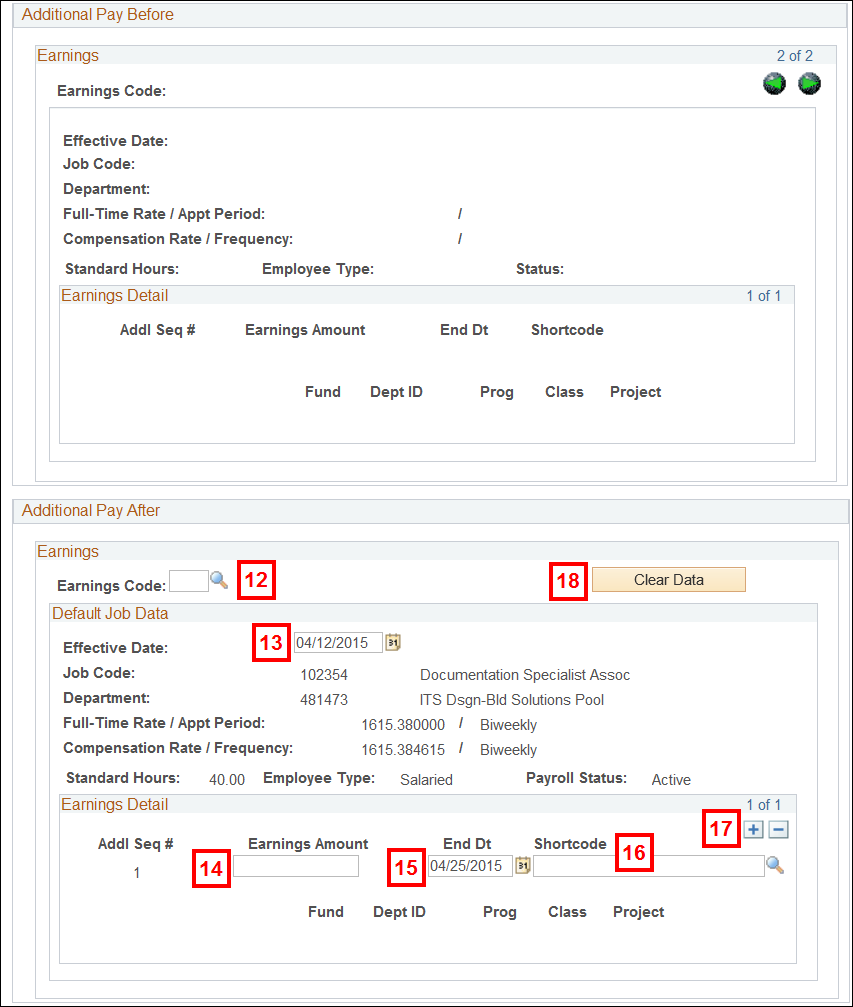
- Enter or lookup
 the Earnings Code.
 - Accept the default or enter the beginning of the pay period date in the Effective Date field.
- Enter the additional pay amount in the Earnings Amount field.
- Accept the default or enter the ending of the pay period date in the End Dt field.
- Enter or lookup the Shortcode.
- To add additional shortcodes, click Add row in the Earnings Detail group box and enter the new Earnings Amount, End Dt, and Shortcode.
- If applicable, click Clear Data.
- Enter Comments.
- Complete the PAR:
- If applicable, Add Supporting Documents
- Add Approvers
- If the transaction requires Sponsored Programs approval, creators can find the appropriate Approver by clicking the Sponsored Programs Approvers link.
- If the Shortcode has a Chartfield fund of “20000” or “25000”, you must select an appropriate approver from Sponsored Programs.
- Save, Validate, or Delete the PAR
Note: For a new Additional Pay transaction, the fields in Additional Pay Before group box display blank fields.
Create New Additional Pay Transaction Screenshot
Note: The Effective Date field automatically populates the next pay period begin date based on the employee’s pay frequency.
Note: The End Dt field automatically populates the next pay period end date based on the employee’s pay frequency. If the End Dt is not populated, the additional pay continues to pay for each pay period. Some earn codes allow an open end date where the End Dt is not populated. In these cases, the additional pay continues to pay for each pay period.
Note: Use Clear Data to remove the current transaction. If you have multiple transactions, Clear Data only removes the one that is currently displayed.
Notes:
Conclusion
This concludes the steps for completing a PAR: Additional Pay Change. If you would like to begin a new transaction, see the Create a PAR step-by-step procedure.