Overview
WebNow is a tool that enables units, at their discretion, to create an electronic version, or “image”, of important documentation that pertains to eReconciliation transactions. To add documents using WebNow, users must have the FN User eRecon role.
Note: When adding PDF documents to WebNow, the document cannot be password protected or created with the Adobe Portfolio application.
This procedure includes information on:
Navigation
Wolverine Access > Faculty & Staff > University Business > WebNow
Step-by-Step Process
Customizing the Document Key Header Fields in WebNow for eRecon
Customizing the Document Key Header Fields is helpful for more accurate data entry of the document keys. Follow the steps below to add the header values to your Capture screen.
- Click Capture in the top right portion of the screen.
- Click options.
Note: If you click the drop-down arrow, you must select Explorer Options... from the drop-down list.
- Select FN eRecon from the Application plan drop-down list.
WebNow - Explorere Options Screenshot
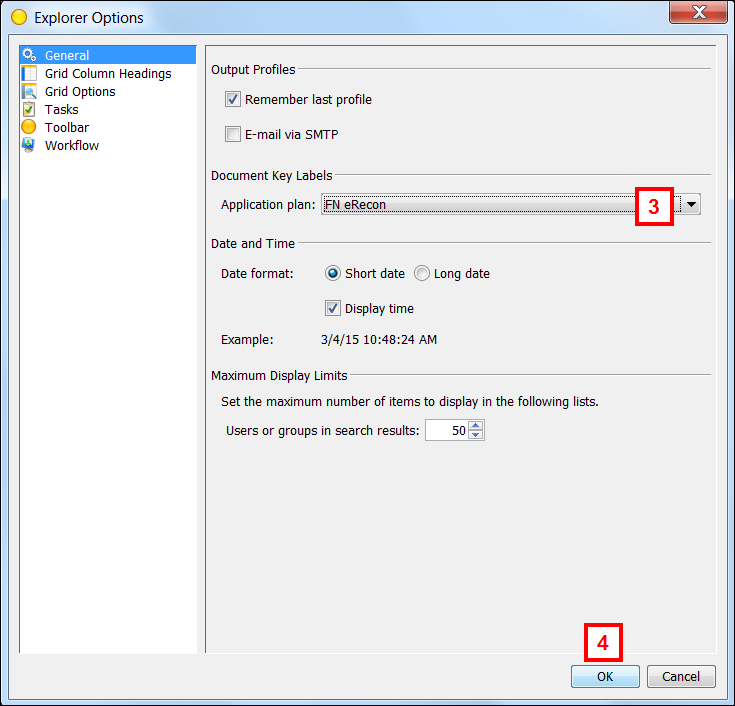
- Click OK.
- The customized Document Key Header fields display for eRecon.
Notes:
- The Document Key Header fields will default to the customized eRecon display each time you enter WebNow unless you manually change the Document Key Labels through the options menu.
- The Drawer and Document Type fields must be updated for each document that is captured.
Note: If you do not apply the FN eRecon Application plan, the data entry fields will display as follows:
- Drawer
- Field1
- Field2
- Field3
- Field4
- Field5
- Document Type
Adding Documents to WebNow
When adding documents in WebNow, it is important to enter the correct keys. Otherwise, the documents will not be accessible via the M-Pathways eReconciliation pages.
- Click Capture in the top right portion of the screen.
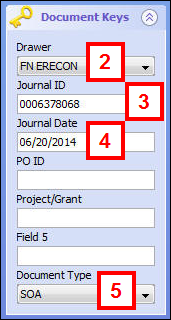
If the image is related to a Journal Entry and should be linked to the transaction in the eReconciliation SOA Detail page in M-Pathways:
Note: Field names will differ if you did not complete the first section of this procedure: Customizing the Document Key Header Fields in WebNow for eRecon.
- Select FN ERECON from the Drawer drop-down list.
- Enter the Journal ID number in the Journal ID orField1 field.
- Enter the date in mm/dd/yyyy format in the Journal Date or Field2 field.
- Select SOA from the Document Type drop-down list.
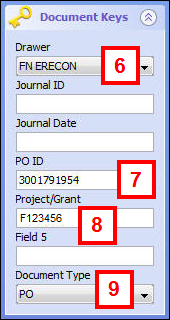
If the image is related to a Purchase Order and should be linked to the Voucher Detail eReconciliation page in M-Pathways:
Note: Field names will differ if you did not complete the first section of this procedure: Customizing the Document Key Header Fields in WebNow for eRecon.
- Select FN ERECON from the Drawer drop-down list.
- Enter the Purchase Order ID number in the PO ID or Field 3 field.
- Enter the Project/Grant number in the Project/Grant or Field 4 field.
- Select PO from the Document Type drop-down list.
Note: If you enter a Purchase Order number, do not enter journal information; if you enter journal information, do not enter information for a Purchase Order.
When adding documents is complete:
- Click Add to upload the document.
- Navigate to the location of the electronic support and click the file to highlight it.
- Click Capture.
Notes:
- Only .pdf and .tif files are allowed.
- You can also drag and drop the document from Windows Explorer to the Capture window.
- Click Create Document.
- To confirm the documents were captured, click Documents.

- Navigate through the file structure to check that the documents you uploaded are in the correct location. To confirm the document was entered correctly the file structure should displays as follows:
- Drawer: FN ERECON
- Field1: Journal ID
- Field2: Journal Date
- Field3: PO ID
- Field4: Project/Grant
- Document Type: SOA or PO
Searching for Documents in WebNow
Users with the FN User eRecon or FN View eRecon role can search for documents previously imaged in WebNow.
When searching for documents, the following views are available:
- eRecon Search by 'Captured by' and date: Search for documents captured by a specific individual's uniqname and the date range for which the document was captured.
- eRecon Search by Journal ID: Search for documents by Journal ID, by entering the 10-digit Journal ID. This will search the FN ERECON drawer for any documents where the Journal ID is either the Folder or Tab document keys.
- eRecon Search by POID: Search by entering a PO ID number. This will search the FN ERECON drawer for any documents where the PO ID was entered in either the Field 3 or Field 4 document keys.
- eRecon Search by Project/Grant: This will allow a user to search by entering a Project/Grant number. This will search the FN ERECON drawer for any documents where the Project/Grant was entered in either as Field 3 or Field 4 document keys.
- If the Views panel does not display on the left, click the Show views pane icon.
- Scroll down to the eReconciliation views.
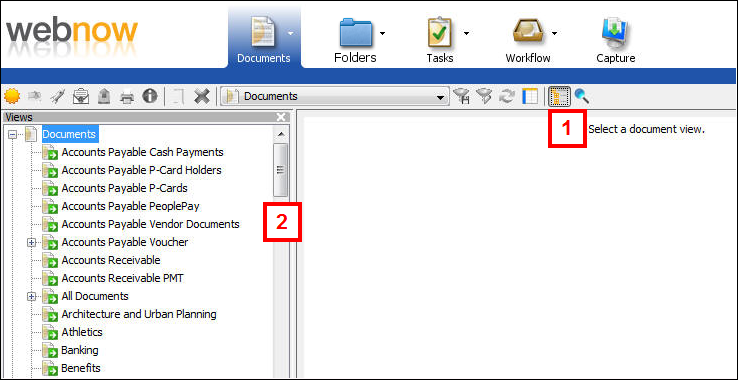
- Click on the desired Search by view.
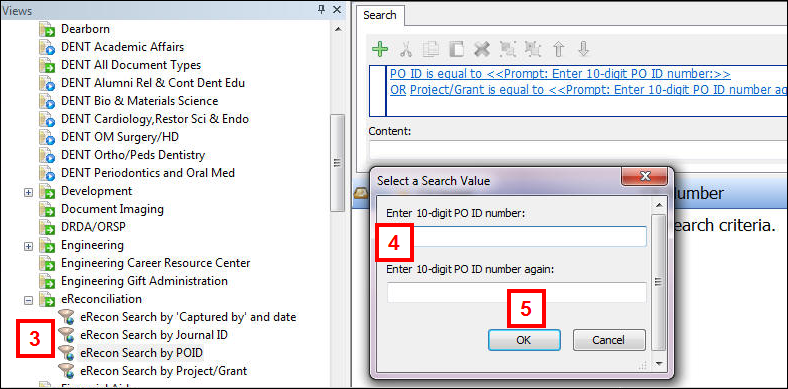
- Enter the search parameters.
- Click OK.
- Review the Search results.
Deleting Documents from WebNow
- Repeat steps 1-6 in the Searching for Documents in WebNow section.
- Click the document you wish to delete.
- Click Delete or right-click on the desired document and select Delete.
Note: If you captured a document to a Drawer other than FN ERECON, you will not have access to delete it. To delete the document, contact the ITS Service Center by emailing 4HELP@umich.edu.
- Click Yes to delete the document.
- Click disconnect to logout of WebNow.
Additional Resources
eReconciliation provided step-by-step instructions for using eReconciliation to reconcile your department's or project/grant's financial activity.
To locate additional eReconciliation information: search using the keyword eReconciliation on the My LINC home page, or navigate using the following catalog path: ITS > Financials > General Ledger > Financial Reporting.