Overview
The merge function in BusinessObjects makes it possible to create a report that displays query results from multiple data sets. You can merge:
- Queries on different universes (data sets) in the Data Warehouse
- Multiple queries in the same universe
All of the queries must have at least one dimension object in common, for example, EmplID or DeptID. For background information, see Overview: Merging Data from Multiple Queries.
This procedure includes the following:
- Create Queries
- Merge Common Dimension Objects
- Edit a Merged Dimension Object
- Create Detail Objects
- Create a Report with Data from all Queries
- Hide Blank Cells
- Turn on Auto-Merge Dimensions Option
Note: This topic is also covered in the Merged Dimensions webinar.
Step-by-Step Process
Create Queries
Before beginning this procedure, you need to create a new report by clicking Web Intelligence in the Application section of the BusinessObjects home page and selecing the desired Universe.
- Create the first query.
- To create the second query, click Add Query.
- Click Universe on the Select a Data Source window.
- Click OK.
- Select a Universe and data set.
- In some cases, this will be the same universe as the first query.
- Click OK.
- Select the result objects.
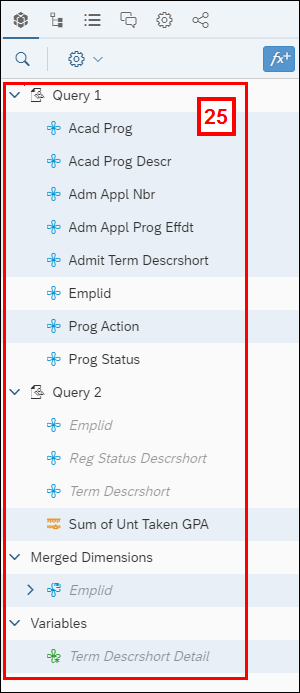
- Query 1 and Query 2 must have at least one dimension object
 in common.
- Query 1 and Query 2 must have at least one dimension object
- Create the query filters.
- To use the same prompts for multiple queries, make sure the prompt text and operators are identical.
- Repeat steps 2-8 for any additional queries.
- Click Run.
- When multiple queries are included in a report, the Run button becomes a drop-down list. If you click the drop-down arrow, there are options to run a specific query or run all queries. If you click Run and not the drop-down list, it runs all queries.
- Respond to any prompts.
- Click Run.

Merge Common Dimension Objects
Notes:
- You must merge at least one dimension object in order to use objects from both queries in the same report.
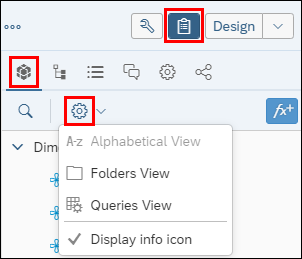
- It may be useful to switch from Alphabetical View to Queries View or Folders View on the Document Objects panel. Click Main Panel
 , then Document Objects
  . Click View modes and settings
  and select the view.
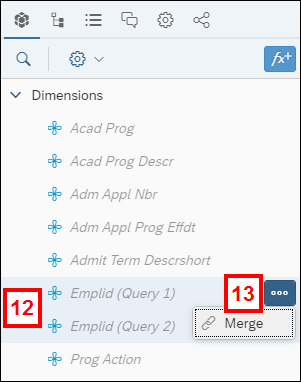
- CTRL + click the dimension objects you want to merge in the Document Objects panel.
- Click the three-dot More menu for one of the objects and select Merge.
- Repeat steps 12-13 to create additional merged dimension objects. Depending on how you are viewing the objects in the Document Objects panel, the merged dimensions display:
- Alphabetical view - under a single heading with an Expand Node arrow next to the object which you can click to see the individual merged objects.
- Queries View and Folder view - in a Merged Dimensions folder.
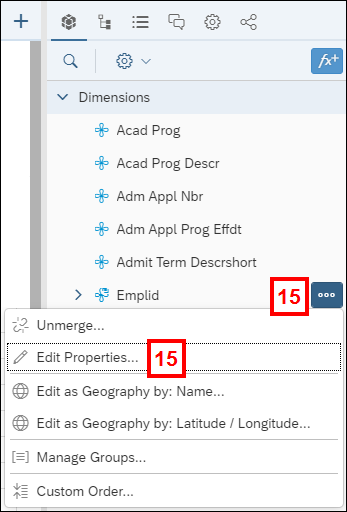
- To change the name or source dimension of a merged dimension object, click the three-dot More menu for the merged dimension object and select Edit Properties.
Edit a Merged Dimension Object
- To remove an specific object from a merged dimension, click the three-dot More menu next to the object in the Document Objects panel and select Remove from merge. This only applies if there are more than two items in a merge.
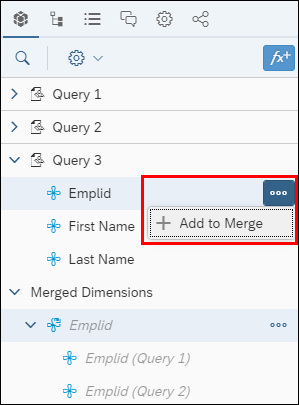
- To add a specific object to a merged dimension:
- Click the object on the Document Objects panel.
- CTRL + click the merged dimension object.
- Click the three-dot More menu next to either selected object and select Add to merge.
Create Detail Objects
Notes:
- When creating a report that displays objects from multiple queries, you can include:
- Any merged dimension objects.
- Unmerged dimension objects from the first query you select. You must create detail objects for unmerged dimension objects from any additional queries.
- Measure objects from either query. However, the measure objects may calculate differently because of the new objects in the report.
- Save time by creating detail objects for the query with the fewest unmerged dimension objects. In this procedure, Query 2 has fewer unmerged dimension objects than Query 1. There is one merged dimension (Emplid).
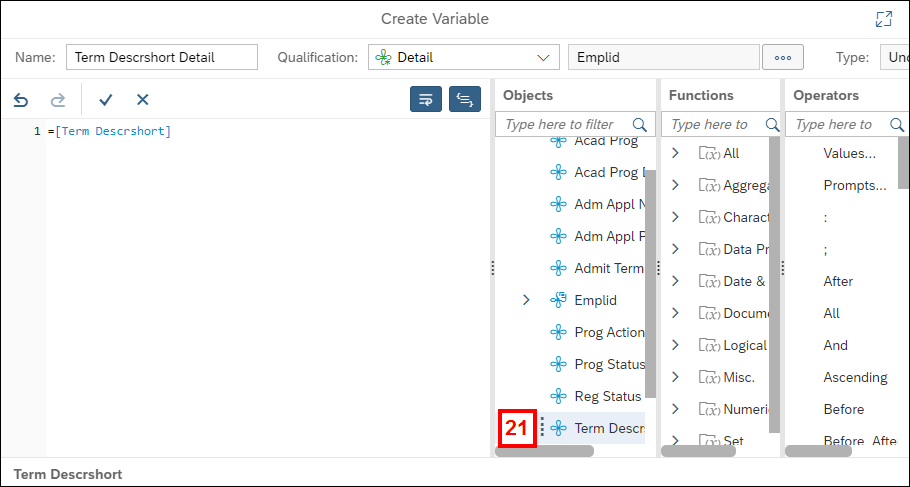
- Click Add a New Variable
 on the Document Objects panel.
 - Enter a Name.
- Select Detail from the Qualification drop-down list.
- Click Display list of dimensions
 .
. - Click the applicable merged dimension object on the Objects and Variables window and click OK.
- If there are multiple values of the detail object for each value of the associated dimension, the #MULTIVALUE error displays in the table. You need to select a merged dimension object that has a one-to-one or many-to-one relationship with the detail object.
- Double-click the applicable dimension object in the Objects list.
- Click OK.
- Repeat steps 16-22 for any additional detail objects.

Create a Report with Data from All Queries
- Click or right-click the Report 1 tab and select New.
- Hold down the CTRL key and select the objects to display in the Available Objects panel. You need to select:
- The merged dimension object(s)
- Any dimension objects from the first query
- Any measure objects from the second query
- The detail objects you created for the second query
View Selecting Objects Example
- Drag the selected objects onto the blank new report.
- If your detail object column displays the #MULTIVALUE error:
- Click the table once to select it.
- Click the Properties Panel
 , Report Element Panel
  , then Display Settings
  .
. - Uncheck the Avoid duplicate rows aggregation box under the Columns and Rows header.
Hide Blank Cells
Your table may display blank cells in rows where one data provider contains values and another does not. To set a filter to hide blank cells:
- Verify the report is open in Design mode.
- Click a cell in the column that displays blanks.
- You may need to double-click the cell to select it, depending on if the table had previously been selected.
- Right-click on the selected cell.
- Click Data and select Add Filter.
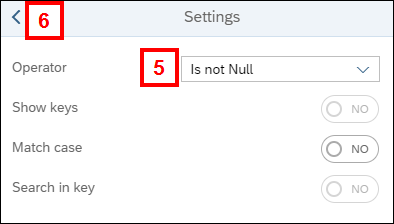
- Click Settings on the Select Value window.
- Select Is not Null box from the Operator drop-down list.
- Click Back.
- Click OK.
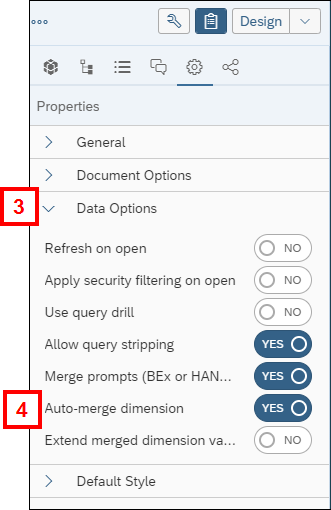
Turn on Auto-Merge Dimensions Option
When the Auto-merge dimensions option is turned on, dimension objects with the same name are automatically merged. It is off by default, but can be turned on for a specific document.
- Verify the report is open in Design mode.
- Click Main Panel and Document Properties .
- Expand the Data Options section.
- Click to toggle the Auto-merge dimension to Yes.
- Click Apply.