Overview
This document provides a guide to locating BusinessObjects (BO) 4.2 functions when working on a report in Reading mode in the upgraded BO 4.3 environment. It lists all of the BO 4.2 toolbars and contextual menus, and explains where each item is in BO 4.3. You can use the Contents to jump to a specific toolbar or menu.
This is a detailed reference document intended to help users transition from BusinessObjects 4.2 to BusinessObjects 4.3. If you are looking for a high-level overview of BO 4.3 changes, see the Business Objects v4.3 Overview of Changes. If you are new to BusinessObjects or looking for instructions on how to perform specific BusinessObjects functions, see the BusinessObjects Resources document.
Design mode: If you are working on reports in Design mode, a BusinessObjects 4.3 - Function Changes (Design Mode) document is available.
Contents
Reading Mode Toolbar
 BO 4.2 Toolbar - Toolbar icons are listed below with an explanation of their BO 4.3 locations.
New 
No longer on toolbar. To create a new report, go to the BI Launch Pad and click Web Intelligence.
Open 
No longer on toolbar. To open a report, go to the BI Launch Pad, navigate to the report and open it.
Save / Save As 
In File section of toolbar:

When using Save As, the options are the same, however the layout of the Save As screen has changed.
View comparison of Save As screens
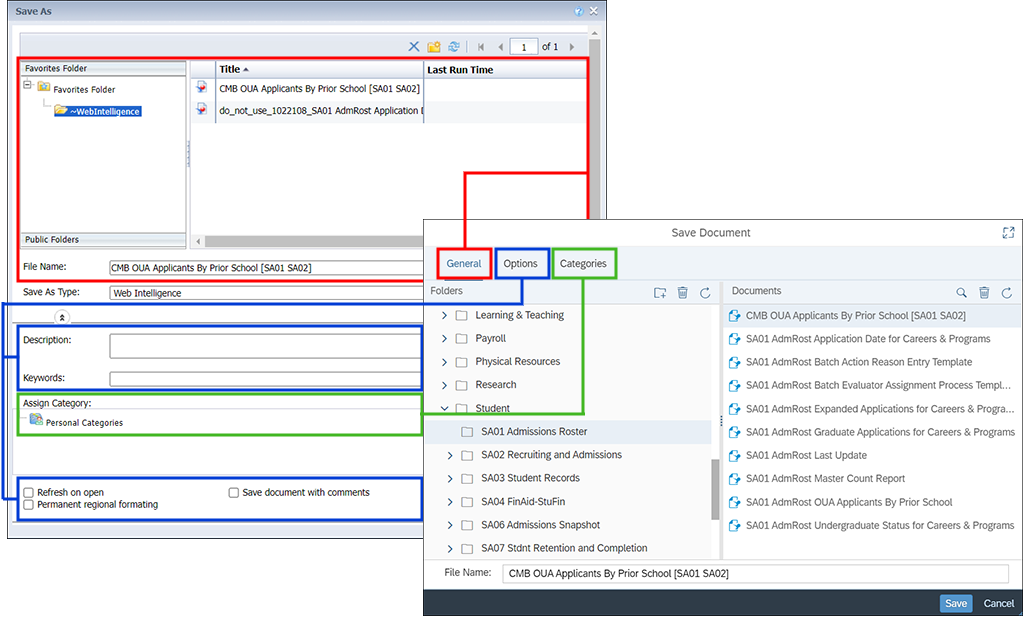
BO 4.3 divides the Save As options into three separate tabs, compared to all options being on one screen in BO 4.2. The folder structure and file name fields are on the General tab. The description, key words, and setting checkboxes are on the Options tab. The Assign Categories selection is on the Categories tab.
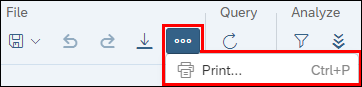
Print 
Available under the three-dot menu in the File section of the toolbar:
When using Print, the options are the same, however the layout of the Print screen is different.
View comparison of Print screens
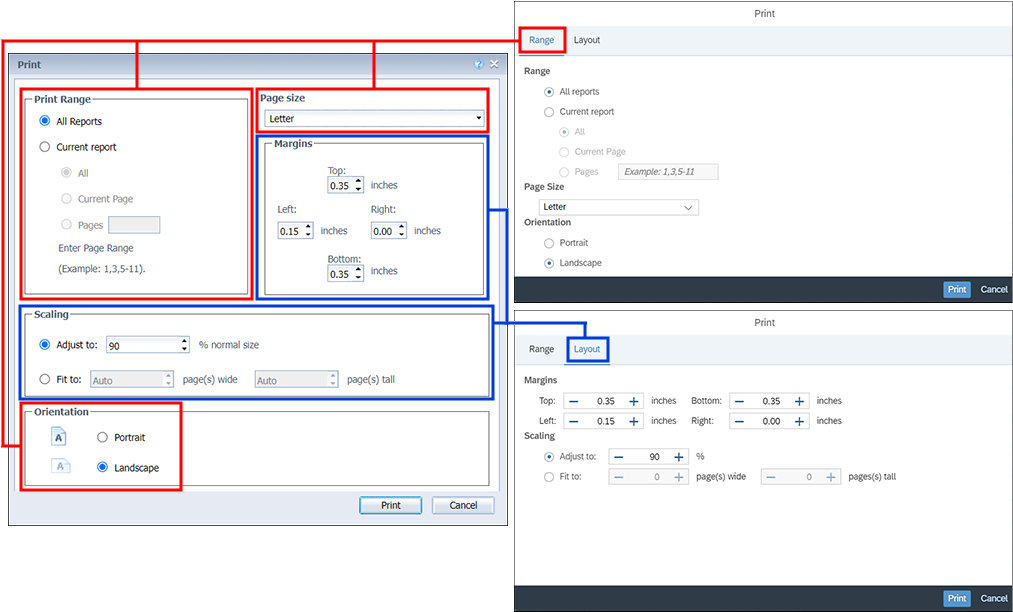
BO 4.3 divides the Print options into two screens. The Print Range, Page Size, and Orientation options are on the Range tab. The Margins and Scaling options are on the Layout tab.
Find 
No longer on toolbar. Use the browser's Find function if you need to search the document.
History 
No longer on toolbar. To view the instances history of a document, go to the BI Launch Pad, navigate to the document, click the three-dot menu on the document's tile or row, and select History.
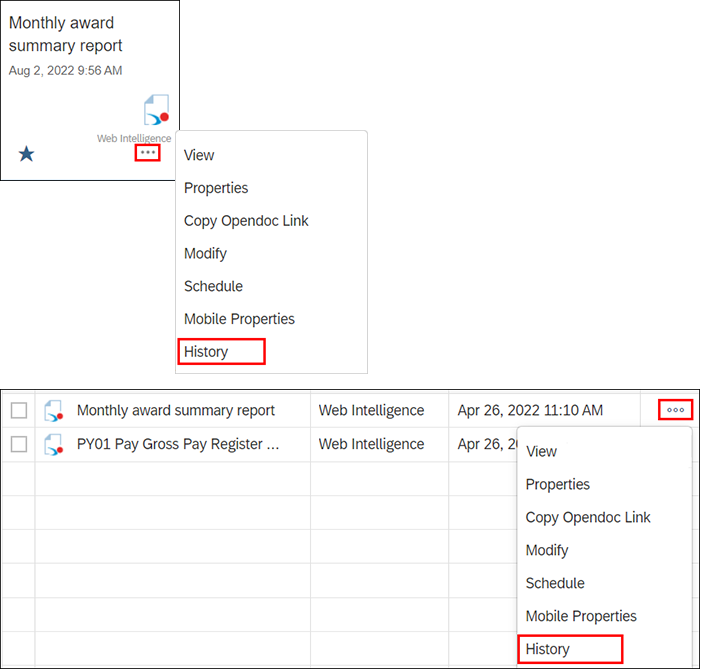
The image above shows the two different ways to access a report's History. If there is a tile available for the report, click the three-dot menu and select History. If you are viewing reports in a grid format, click the three-dot menu on the report row and select History.
Export 
In File section of toolbar:

BO 4.3 has removed the Excel .xls option and added an HTML option; other options remain the same. The layout of the Export screen is different.
View comparison of Export screens
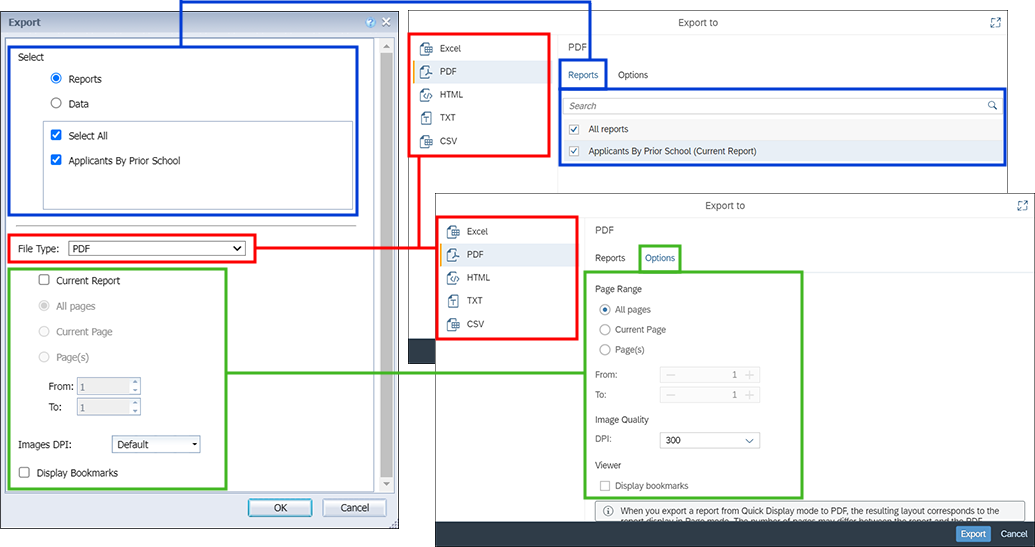
The Export screen in BO 4.3 has been redesigned. The file export formats are in a left-hand panel rather than a drop-down list. Once a format is chosed, the report selection is on the Reports tab. The various settings related to the chosen file format, such as page range, are on the Options tab.
Send To 
Send to BI Inbox is available under the three-dot menu in the File section of the toolbar:
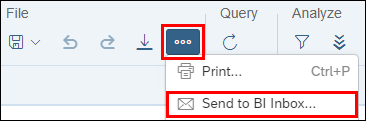
There are no longer mail and FTP options. The interface has changed both in how individuals are selected (BO 4.3 uses checkboxes) and how options are displayed.
View comparison of Send To BI Inbox screens
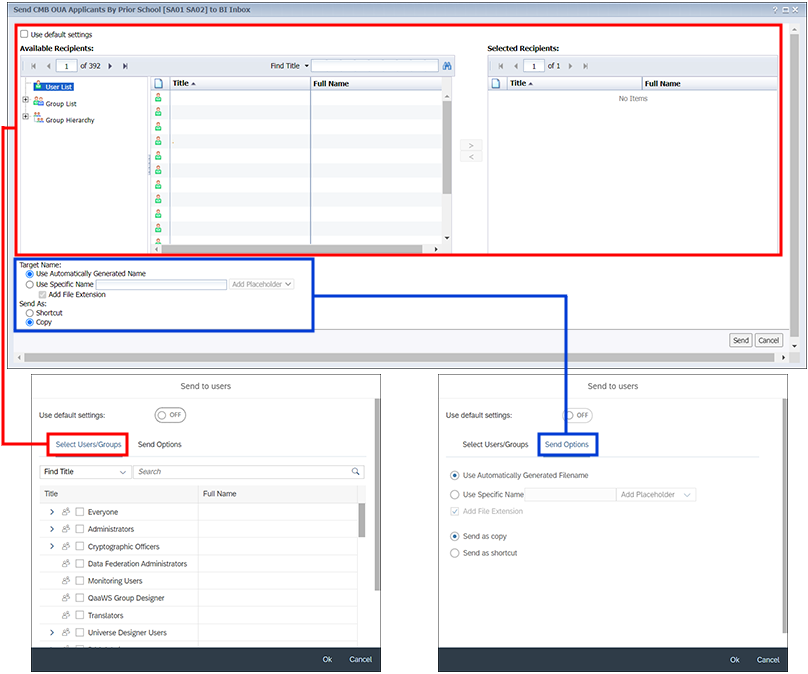
The screen for sending a report to a BI Inbox has been redesigned. You search for and select users on the Select Users/Groups tab in BO 4.3. As with similar selection screens, the move arrows have been replaced with checkboxes. The options for setting a target name and the type of file to send (copy or shortcut) are now on the Send Options tab.
Undo / Redo 
In File section of toolbar.

Refresh 
In Query section of toolbar:

There is no longer an option to refresh specific queries; you can only refresh all. The Prompts screen that displays has the same options but in a different interface.
View comparison of Prompts screens
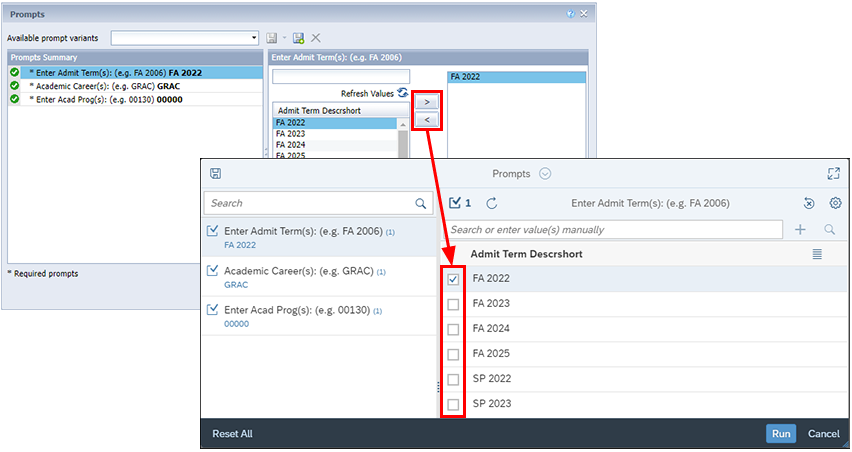
The image above shows the look and feel difference between the BO 4.2 Prompts window and the BO 4.3 Prompts window. The highlighted areas show the change between using arrows to select values and using checkboxes.
Track (Track, Show Changes, Display Options) 
There are Show Changes  and Track Data Changes
  icons in the Analyze section of the toolbar:

The Display Options are on the Track Data Changes screen on the Tracking Options tab.
Drill 
In Analyze section of toolbar:

The drill feature is now called Enable Navigation. It functions the same in BO 4.2 and BO 4.3.
Filter Bar 
In Analyze section of toolbar:

Filters can only be applied in Design mode. If there is not currently a filter on the report, clicking Filter allows you to view a summary of the current prompts used in the report.
If a report has a filter applied, the Filter icon has a dot next to it. When you click the icon, its background turns dark and the filter bar displays:

Click the X next to a filter to remove it. You cannot add or edit a filter.
Freeze 
In Display section of toolbar:

The icon only freezes the headers. To freeze specific columns, right-click on the table and click the Freeze icon that displays to the right of the table.
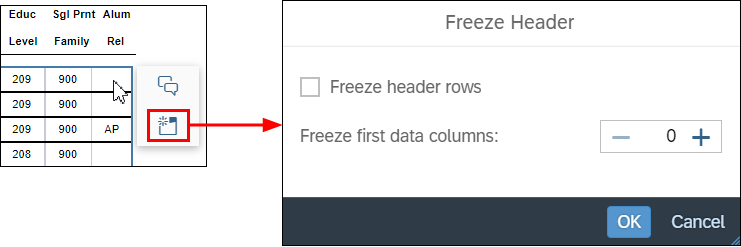
The image above shows how the Freeze icon displays to the right of the table when you right-click in a cell. Once clicked, the Freeze Header options display.
Outline 
In Display section of toolbar:

The Outline is now Enable Folding/Unfolding of Breaks and Sections. You still click the arrows that display to fold/unfold a report element.
Side Panel
The BO 4.2 left-hand panel includes five functions: Document Summary, Navigation Map, Input Controls, User Prompt Input and Comments.
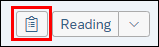
In BO 4.3, this is the Main Panel and is on the right side. Click the Show Main Panel icon to open the panel.
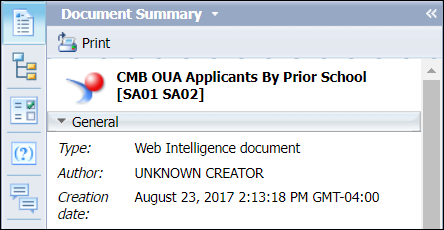
Document Summary
On the Main Panel, click Show Document Properties:
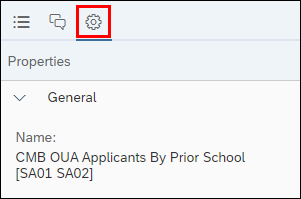
The properties panel has been simplified in BO 4.3. There is no longer a Parameters section, and the data shown in the Document Options and Data Options sections have been reduced.
Navigation Map
On the Main Panel, click Show Report Map:
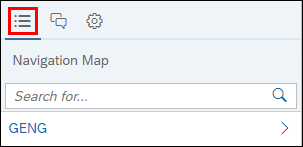
The information shown on the panel is the same in both BO 4.2 and BO 4.3, however how you interact with the panel has changed. Instead of seeing all report tabs at once, you see only the currently selected tab. You drill down into the data by clicking the arrow next to a value, not using expandable/collapsible sections.
View comparison of Navigation Map panels
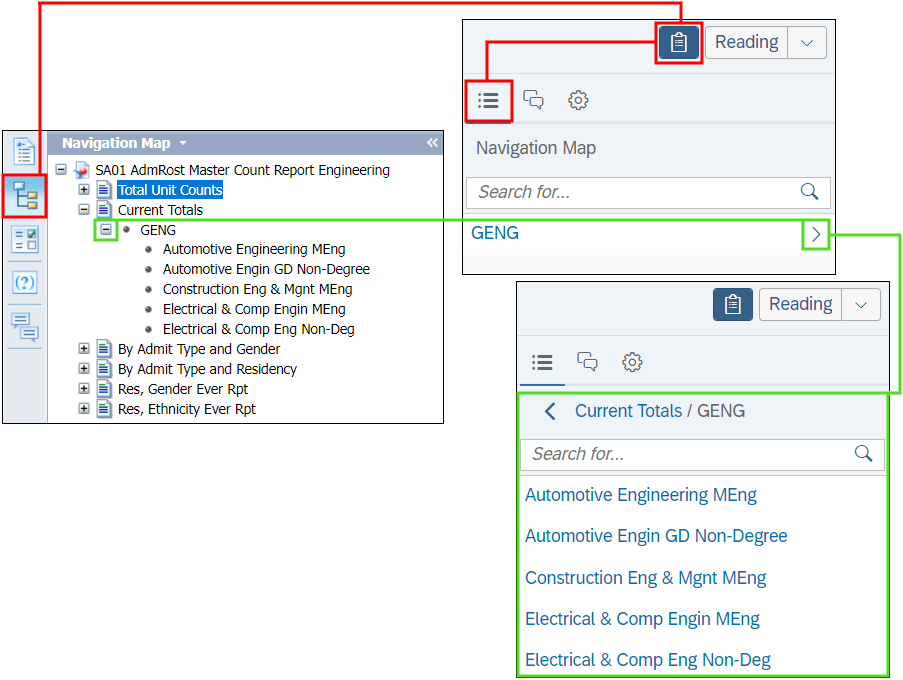
The image above shows the look and feel difference between the BO 4.2 Navigation Map panel and the BO 4.3 Report Map panel. The Report Map is opened by clicking Show Main Panel, then Show Report Map. To drill down into the data, click the arrow next to a value in the Report Map.
Input Controls
Not available in BO 4.3.
User Prompt Input
Not available in BO 4.3. Refresh the report to change the prompt values. To see a list of current prompt values, click Show Filter Bar and click the Prompts button.

Comments
On the Main Panel, click Show Comments:

Status Bar
The Status Bar displays in BO 4.2 when enabled:

The BO 4.3 status bar is dynamic; it displays at the bottom of the screen when your cursor is over the report:

Track Changes On/Off 
Whether or not Track Changes is on is indicated by the Show/Hide Changes icon; if the icon is dark blue, it means changes are being shown:

Page Navigation
On the status bar:

Quick Display and Page Mode 
No longer on status bar. The status bar has options for Show Print Mode, Fit to Width and Fit to Page:

Zoom 
On the status bar:

When clicked, the zoom percentage can be changed using a slider.
Refresh / Last Refresh 
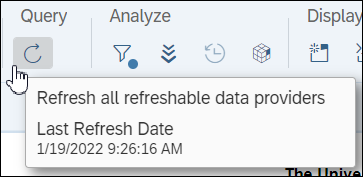
Click Refresh in the Query section of the main toolbar to refresh the report.:
To see when the report was last refreshed, hover over the Refresh icon: