Overview
This procedure describes how:
- Locate a Report
- Save and Open a Copy
- Open the Query Panel
- Add/Delete Result Objects
- Add/Delete Query Filters
- Run the query
- Add a Column
- Add a Calculation
Although this scenario uses a UM-Maintained report, the same steps could be used to modify any Web Intelligence report.
Note: This topic is also covered in the Modify a U-M Maintained Report webinar.
Step-by-Step Process
Locate the Report
- Click the Folders tile on the BusinessObjects home page.
- Navigate to the folder that contains the report. For example, Public Folders > UM-Maintained > Student > SA02 Recruiting and Admissions to select a Recruiting and Admissions report.
Save and Open a Copy
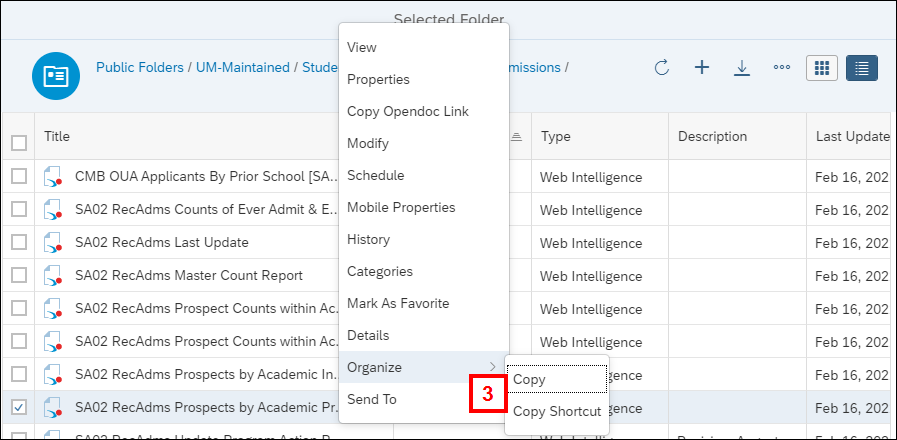
- Right-click the report title and click Organize, then select Copy.
- A UM-Maintained report cannot be modified. A copy needs to be saved to Personal Folders and the copy can be modified.
- Organize > Copy can also be accessed by clicking the three-dot More menu at the end of the report row, or by checking the box next to the report title and clicking the three-dot More menu at the top of the folder component.
- Click Personal Folders
- If the report should be saved in a subfolder within Personal Folders, open that folder.
- Click the three-dot More menu at the top of the screen
- Click Organize, then Paste.
- Click the report title to open it.
- Alternately, you can right-click on the report title, or click the three-dot More menu at the end of the report row, and click Modify. This opens the report in Design mode.

Open the Query Panel
- Click Reading in the upper right-hand corner to toggle to Design mode, if the report is not already in Design mode.
- To modify the underlying query or queries, click Edit
 in the Query section of the toolbar.

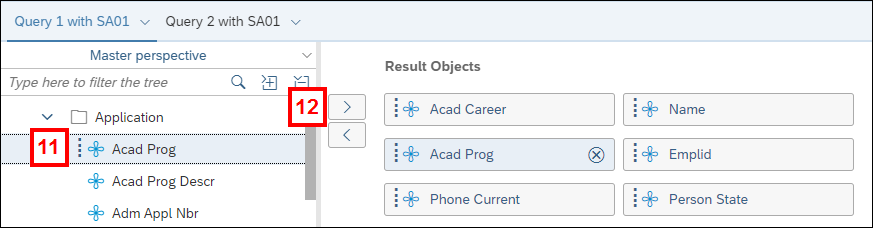
Delete/Add Result Objects
- To delete an object in Result Objects section, select it and click either Delete
 on the object or click Remove
  at the top of the Result Objects section.
 - To add an object, locate and click on the object on the left-hand panel.
- Click Add Object
 .
. - Alternately, you can double-click the object or drag and drop it to add it to the Report Objects section.

Notes:
- You can filter/search for an object using the Search field in the left-hand panel.
- Click any object in Result Objects to see which folder it came from. The object is highlighted in the left-hand panel.
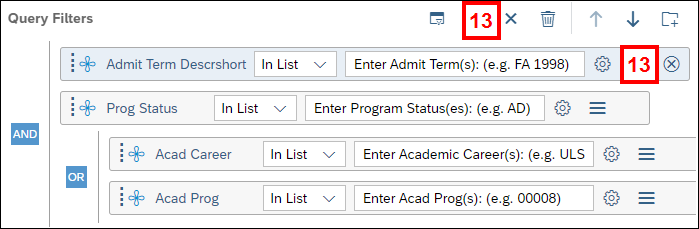
Delete/Add Query Filters
- To delete a query filter, select it in the Query Filters section and click either Delete on the filter row or click Remove at the top of the Query Filters section.
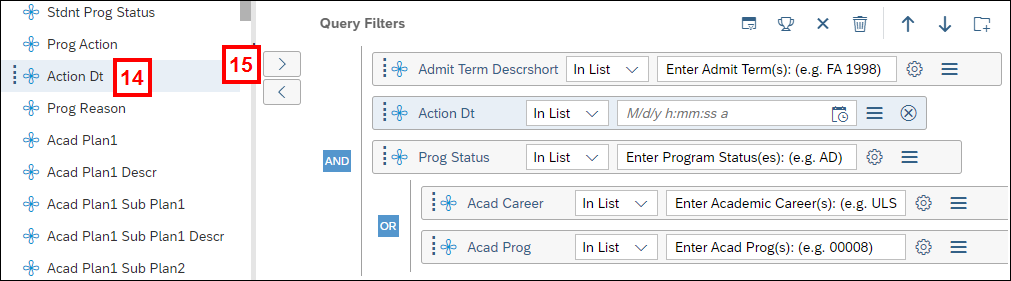
- To add a query filter, locate and click on the object on the left-hand panel.
- Click Add Filter .
- Alternately, you can drag and drop the object into the Query Filters section from either the left-hand panel or the Result Objects section, if it is listed in that section.
- Select an Operator from the drop-down list, or accept the default, In List.
- Click Define Filter Type
 and select an option for the query filter's operand (specific value(s)). Options include:
- Constant - Separate multiple values by a semicolon, no space. Values are case-sensitive.
- Value(s) from list - Check the box next to each value and click OK.
- Prompt - asks for values each time the query is run.

Run the Query
- Click Run.
- Respond to prompts, if present.
The report opens in Design mode.
Add a Column
Note: If a new result object was added to the query, it must be manually added to the report. It may be easier to insert a blank column first.
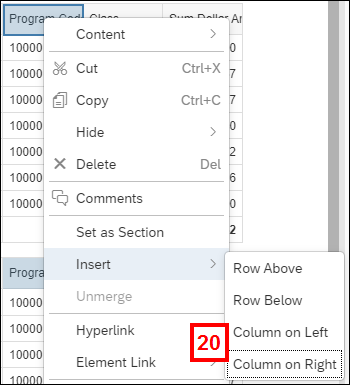
- To insert a blank column, right-click a column and click Insert, then select Column on Left or Column on Right.
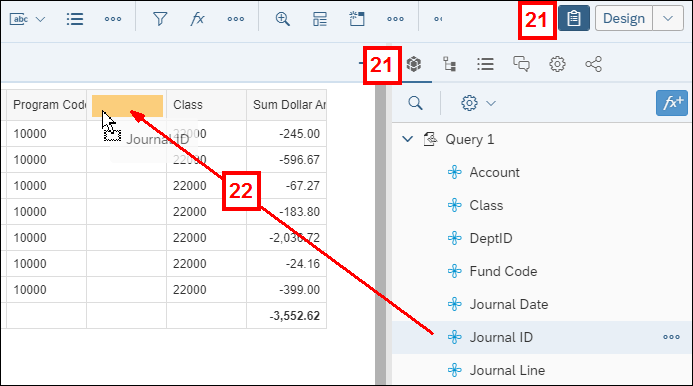
- Click Main Panel
 and Document Objects
  .
. - Click an object in the Document Objects panel and drag it into the blank column.
- Release your mouse when the highlight is in the column.
- If you opted not to insert a blank column, release your mouse when the highlight displays at the edge of a column. This creates a new column rather than inserting the object into an existing column.
Insert a Calculation
- Right-click the column, select Footer Calculation, then select the calculation.
- The available calculations are based on the type of data in the column.
Save the Report
- Click Save
 .
.
- To save the report with a new name or to a new folder, select Save As from the Save drop-down list.