Overview
This procedure explains how to import a local Excel file to Personal Folders and use it as a data provider in a BusinessObjects report.
Before uploading a file, verify the data is compatible with the query or queries you plan to connect with the file. You should also review and edit the Excel headers for clarity because the header names become the Object names in BusinessObjects.
Note: This topic is also covered in the use Excel File as a Data Provider webinar.
Step-by-Step Process
Import an Excel File to Personal Folders
An Excel file cannot be brought directly into the Query Panel. First it must be imported into your BusinessObjects Personal Folders.
- Click the Folders tile on the BusinessObjects home page and open the personal folder where you want to save the Excel file.
- Click Create/Upload Objects
 .
. - Select Upload Document.
- Click Browse, then navigate to and select the Excel file.
- If needed, you can enter a new Title, a Description and Keywords. You can also assign it to a Category.
- Click Add.
View Create/Upload Objects Menu

Use the Excel File as a Data Provider
Once the Excel file is in Personal Folders, it can be used as a data provider.
- Click the Web Intelligence tile on the BusinessObjects home page.
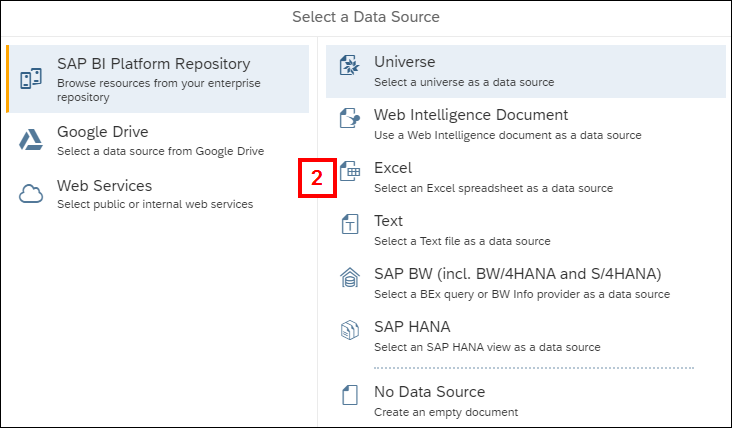
- Click Excel on the Select a Data Source window.
- Click OK.
- Select the Excel file from My Folders and click Open.
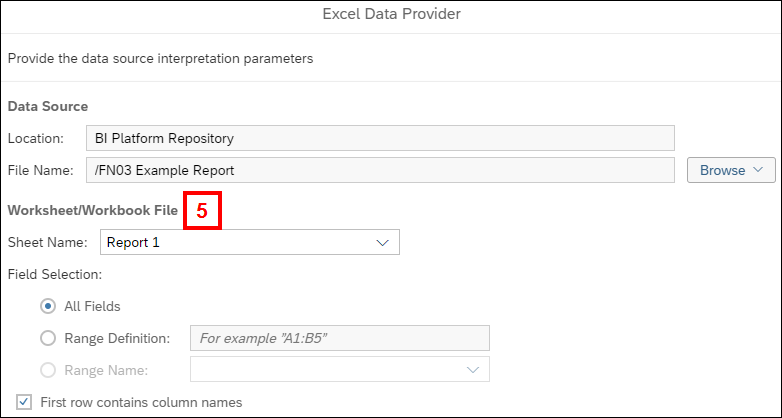
- Edit any of the options in the Worksheet/Workbook File section as needed on the Excel Data Provider window.
- For example, if the Excel file has multiple sheets, you could set a specific sheet as the data source. If your Excel file does not have column headers, you can uncheck the First row contains column names box.
- Click OK.
View Select a Data Source Window

View Excel Data Provider Window

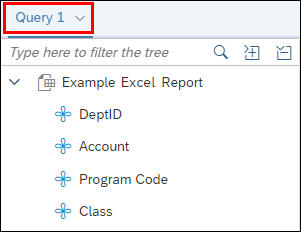
The Excel file displays as Query 1 on the Query Panel, with each column displayed as an object in the left panel.

Click Add Query to bring in data from the Data Warehouse. Data from this second query can be merged with the Excel data. See the Merge Data from Multiple Queries page for more information.
Update the Excel File
If you make changes to the Excel file and want to bring those changes into the BusinessObjects report, you need to Import the revised Excel file to your Personal Folders (see the Import an Excel File to Personal Folders section above). The next step is to select the revised Excel file as the source file in your report.
- Open the report that uses the Excel file and make sure it is in Design mode.
- Click Edit
 in the Query section of the toolbar to open the Query Panel.
 - Verify the Query tab for the Excel file is selected.
- Click the three-dot Browse menu and select SAP BI Platform Repository.
- Navigate to and select the Excel file in My Folders, and click Open.
- Run the report and view the updated results. Detail objects and merged dimensions should be intact.
