Overview
By default, report tables are sorted according to column order. If you need to sort the data differently, you can apply your own sorts.
Reports must be in Design mode in order to apply a sort.
This procedure covers the following:
Note: This topic is also covered in the Applying Sorts webinar.
Add a Sort
- Right-click any data cell in the column you want to sort.
- Be sure the cell is selected before right-clicking. The first time you click on the cell, the table is selected, as shown by a dark outline. The second time you click, the cell is selected and the column highlighted.
- Click Data and select Add Sort.
- By default, sorts are in ascending order.
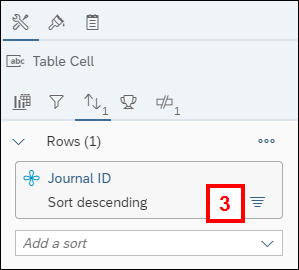
- When you apply a sort, the Sort Panel opens on the right side of the screen. This displays the current sort and any other sorts applied to the report.
- To change the sort to descending, click the Sort Descending/Sort Ascending toggle on the Sort Panel.
- Repeat steps 1-3 to apply any additional sorts.
- Sorts are applied to the report in the order added. For example, if you applied a sort to the Date column, then the DeptID column, the report would sort by Date first, then DeptID. You can change the order of the sorts on the Sort Panel. Drag and drop the sort boxes so the primary sort is at the top of the list, secondary sort is second in the list, etc.
Sorts can also be added using the Properties Panel.
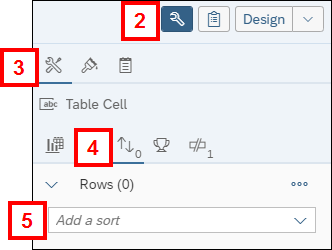
- Click the table or a cell to select it.
- Click the Properties Panel icon

- Click the Report Element Data icon
 .
. - Click the Sort Panel icon

- Select the field by which you want to sort the report from the Add a sort drop-down list.
Remove a Sort
- Right-click any data cell in a column with a sort.
- Click Data and select Remove Sort.
There are two other methods for removing sorts:
- Click on a sort in the Sort Panel. Click Delete
 .
. - To remove all sorts, click the three-dot More menu on the Sort Panel and select Clear all Sorts.
Apply a Custom Sort
Use a custom sort to choose your own sort order or add values to the list of values. The custom order is applied to the entire document, not just the table or chart.
- Click on the Sort in the Sort Panel where the custom sort will be applied.
- Click the three-dot More menu and select Create Custom Order.
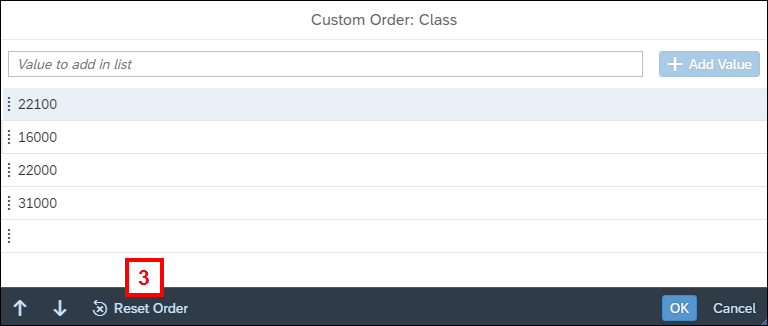
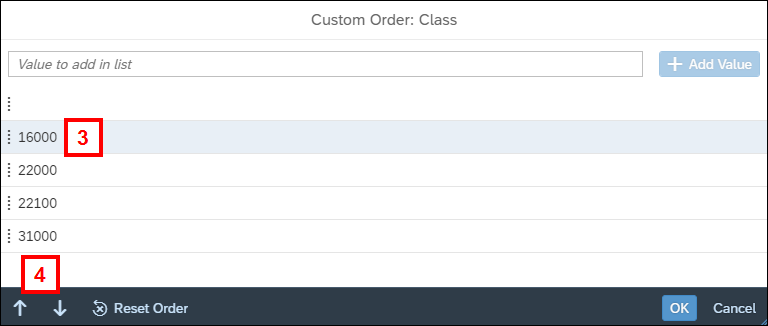
- Click a value in the list.
- Use the up and down arrows to position the value where you want it to be in the sort order.
- The values can also be repositioned by dragging and dropping them within the list.
- Repeat steps 3-4 as needed until all values are positioned.
- Click OK.

Note: The Add Value button is active only if it is applicable to the custom sort. You can use it to add additional values to the list.
Remove a Custom Sort
If you want to apply an ascending or descending sort to a column with a custom sort, you must first remove the custom sort.
- Click on the Sort in the Sort Panel where the custom sort will be applied.
- Click the three-dot More menu and select Create Custom Order.
- Click Reset Order.
- Click OK.