Overview
The BusinessObjects delimiter marcro for Excel is used to paste a list of values, or create grouped values, in BusinessObjects. The following instructions explain how to install and remove the BusinessObjectshelpers Add-In.
If you have previously installed the BusinessObjectshelpers.xlam Add-In file but are experiencing a Digital Certificate Expired error when trying to use the Macro, you need to first remove the Add-In and then reinstall it.
Note: These instructions reference the Excel Options menu. Depending on your Excel version, the Options menu is located in one of the following ways:
- Microsoft Office 360: Start Excel, or if a spreadsheet is already open click File. Options is located at the bottom of the left-hand panel.
- Excel 2016: Start Excel and click Open Other Workbooks, or if a spreadsheet is already open click File. Options is at the bottom of the left-hand panel.
Step-by-Step Process
Install BusinessObjectshelpers Add-In
- Download the BusinessObjectshelpers.xlam file from Dropbox.
- Note where the file is saved on your computer; you will need to navigate to it later in this process.
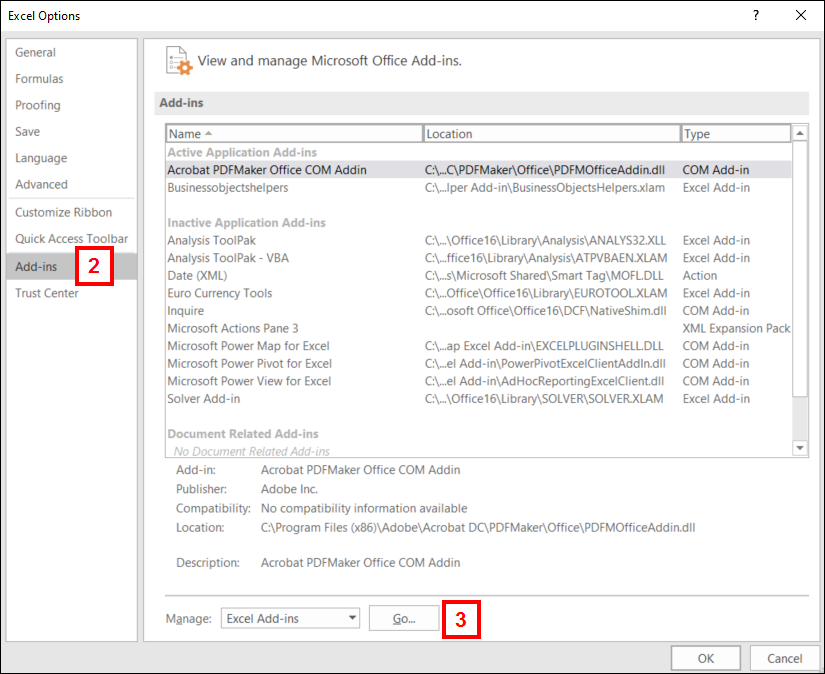
- In Excel, click Options.
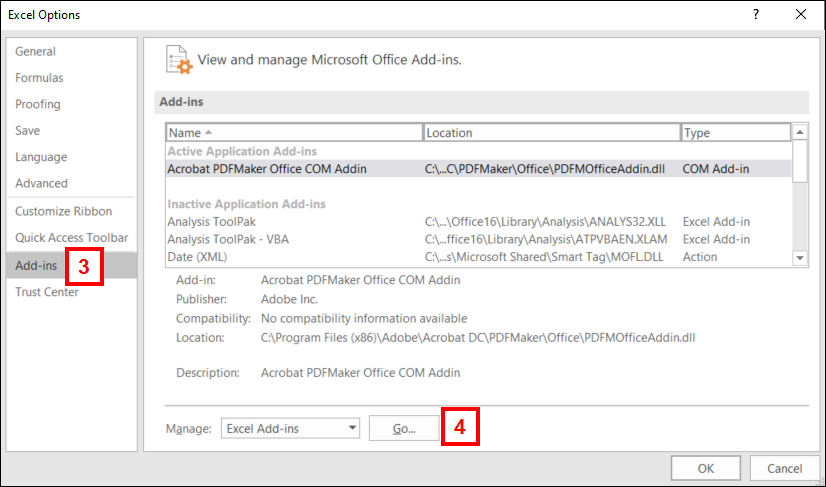
- Click Add-Ins.
- Click Go.
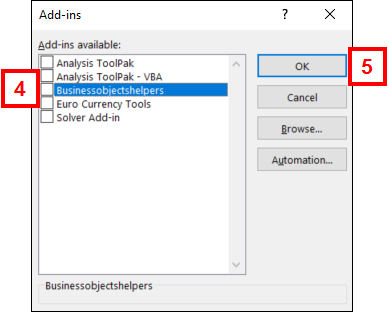
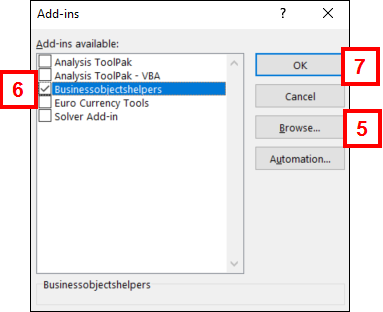
- Click Browse, then navigate to and select the BusinessObjectshelpers.xlam file downloaded in step 1.
- Verify the Businessobjectshelpers box is checked in the Add-ins available list.
- Click OK.
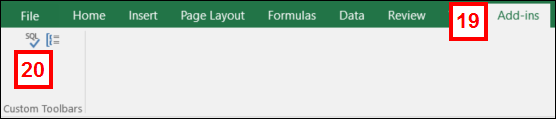
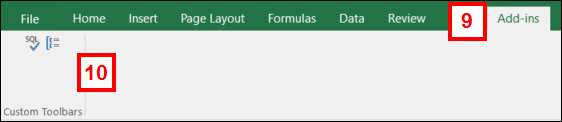
- Open an Excel spreadsheet.
- Click the Add-Ins menu.
- Verify the Custom Toolbars are available.
If needed, you can test the Add-In using the following steps:
- Open the Excel spreadsheet on which you want to use the Add-In.
- Highlight the column and rows you want to copy into BusinessObjects.
- Click the Add-Ins menu, then click SQL.
- In the BusinessObjects List Delimiter Version 2.0 window, change the Delimiter to a semicolon (;).
- Click Copy.
- If there are more than 999 rows selected, the data is broken into batches. You have to select, copy, and paste each batch individually.
- Paste the data into a BusinessObjects report filter or wherever you want to use the files.
Remove BusinessObjectshelpers Add-In
- In Excel, click Options.
- Click Add-Ins.
- Click Go.
- Uncheck the Businessobjectshelpers box.
- Click OK.
- Click the Excel Options.
- Clicking OK in the previous step closes the Options menu. It needs to be reopened.
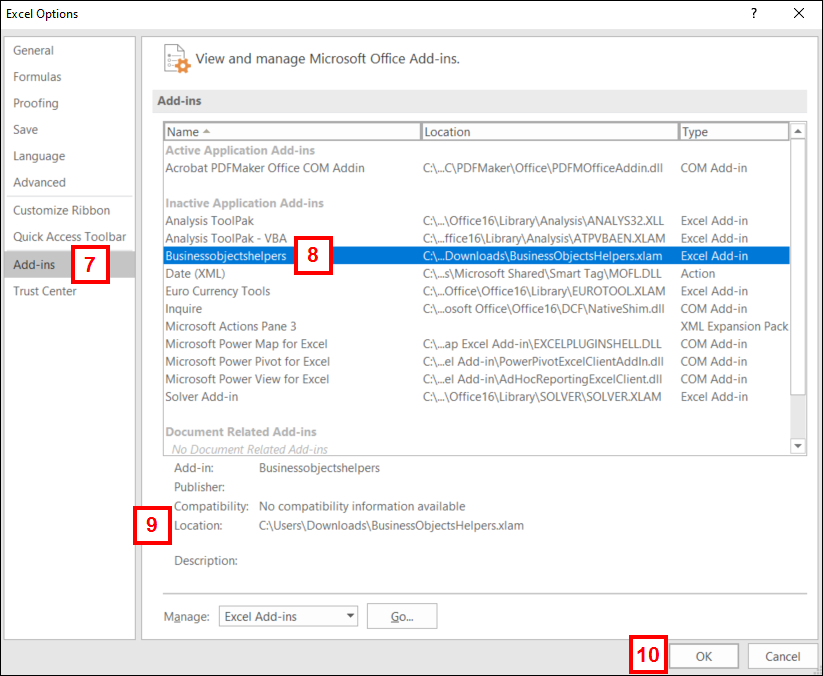
- Click Add-Ins.
- Click the Businessobjectshelpers row in the list of Add-Ins.
- View the Businessobjectshelpers.xlam location.
- Click OK.
- Navigate to the file location and delete the Businessobjectshelpers.xlam file.
- If you installed or attempted to install the add-in multiple times, be sure to delete the file from all saved locations.
- Click the Excel Options.
- Click Add-Ins.
- Click Go.
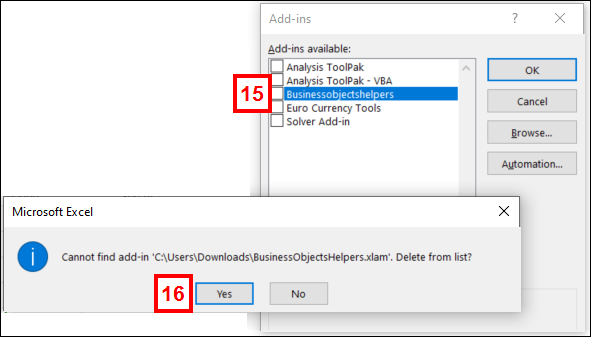
- Click Businessobjectshelpers in the Add-ins list.
- Click Yes to the message that the Add-in could not be found and if it should be deleted from the list.
- Click OK.
- Open an Excel spreadsheet.
- Click the Add-Ins menu.
- Right-click SQL and select Delete Custom Toolbar.